New
Jul 2, 2019 4:12 PM
#251
| @SheyCroix Unfortunately, that's one of the limits of the app that is used to insert the headers. It places the headers as is correct on the normal, unsorted all anime page. When it is sorted or filtered in any way, the headers are no longer in their correct position. I wish I could give you a better option, but the "fix" here is to disable them appearing on sorted pages entirely. I updated the code in the main forum post to achieve this, which you can also find here: Replace previous version at the top of the code: @\import "https://malcat-gen.appspot.com/headers?template=[data-query*='\"status\":7']:not([data-query*='order']):not([data-query*='tag\"']):not([data-query*='\"s\"']) .list-item:nth-child($index){margin-top:162px;}[data-query*='\"status\":7']:not([data-query*='order']):not([data-query*='tag\"']):not([data-query*='\"s\"']) .list-item:nth-child($index) .status:before{content:'$content'}";Replace previous version at the bottom of the code. /* =======================
CATEGORY HEADERS - ROUNDED
updated 19-07-02 */
[data-query*='"status":7']:not([data-query*='order']):not([data-query*='tag"']):not([data-query*='"s"']) .list-item:nth-child(2) {
margin-top: 58px;
}
.list-item .status:before,
.list-item .status:after {
position: absolute;
top: -40px;
left: 0;
display: block;
width: 1059px;
height: 31px;
background: var(--bg);
border-width: 1px 0 0 1px;
border-style: solid;
border-color: var(--text-head);
border-radius: 16px 16px 0 0;
color: var(--text-head);
font: 20px/31px Oswald;
letter-spacing: 3px;
text-indent: -0.5px;
text-transform: uppercase;
pointer-events: none;
} [data-query*='"status":7']:not([data-query*='order']):not([data-query*='tag"']):not([data-query*='"s"']) .list-item .status:after {
content: "";
top: auto;
bottom: -40px;
height: 32px;
border-width: 0 0 0 1px;
border-radius: 0 0 16px 16px;
} .list-item .watching:before,
.list-item .reading:before,
.list-item .watching:after,
.list-item .reading:after {
border-color: var(--watching);
} .list-item .completed:before,
.list-item .completed:after {
border-color: var(--completed);
} .list-item .onhold:before,
.list-item .onhold:after {
border-color: var(--onhold);
} .list-item .dropped:before,
.list-item .dropped:after {
border-color: var(--dropped);
} .list-item .plantowatch:before,
.list-item .plantoread:before,
.list-item .plantowatch:after,
.list-item .plantoread:after {
border-color: var(--plantowatch);
} |
Jul 2, 2019 6:58 PM
#252

Valerio_Lyndon said: @SheyCroix Unfortunately, that's one of the limits of the app that is used to insert the headers. It places the headers as is correct on the normal, unsorted all anime page. When it is sorted or filtered in any way, the headers are no longer in their correct position. I wish I could give you a better option, but the "fix" here is to disable them appearing on sorted pages entirely. I updated the code in the main forum post to achieve this, which you can also find here: Replace previous version at the top of the code: @\import "https://malcat-gen.appspot.com/headers?template=[data-query*='\"status\":7']:not([data-query*='order']):not([data-query*='tag\"']):not([data-query*='\"s\"']) .list-item:nth-child($index){margin-top:162px;}[data-query*='\"status\":7']:not([data-query*='order']):not([data-query*='tag\"']):not([data-query*='\"s\"']) .list-item:nth-child($index) .status:before{content:'$content'}";Replace previous version at the bottom of the code. /* =======================
CATEGORY HEADERS - ROUNDED
updated 19-07-02 */
[data-query*='"status":7']:not([data-query*='order']):not([data-query*='tag"']):not([data-query*='"s"']) .list-item:nth-child(2) {
margin-top: 58px;
}
.list-item .status:before,
.list-item .status:after {
position: absolute;
top: -40px;
left: 0;
display: block;
width: 1059px;
height: 31px;
background: var(--bg);
border-width: 1px 0 0 1px;
border-style: solid;
border-color: var(--text-head);
border-radius: 16px 16px 0 0;
color: var(--text-head);
font: 20px/31px Oswald;
letter-spacing: 3px;
text-indent: -0.5px;
text-transform: uppercase;
pointer-events: none;
} [data-query*='"status":7']:not([data-query*='order']):not([data-query*='tag"']):not([data-query*='"s"']) .list-item .status:after {
content: "";
top: auto;
bottom: -40px;
height: 32px;
border-width: 0 0 0 1px;
border-radius: 0 0 16px 16px;
} .list-item .watching:before,
.list-item .reading:before,
.list-item .watching:after,
.list-item .reading:after {
border-color: var(--watching);
} .list-item .completed:before,
.list-item .completed:after {
border-color: var(--completed);
} .list-item .onhold:before,
.list-item .onhold:after {
border-color: var(--onhold);
} .list-item .dropped:before,
.list-item .dropped:after {
border-color: var(--dropped);
} .list-item .plantowatch:before,
.list-item .plantoread:before,
.list-item .plantowatch:after,
.list-item .plantoread:after {
border-color: var(--plantowatch);
}You have already done amazingly helping out, so I will accept that suggestion and disable them. Updated with that fix, so many thanks for sharing. |

Jul 3, 2019 10:17 AM
#253
| Hi there! I've been using your Clarity theme for a good while now, and I absolutely love the design! However, there's an issue that I just noticed today. My username that's supposed to appear on the banner is suddenly gone. It's been a long while since I've made any edits, so I don't think that's the issue. Do you know what could be causing this? Thanks in advance! 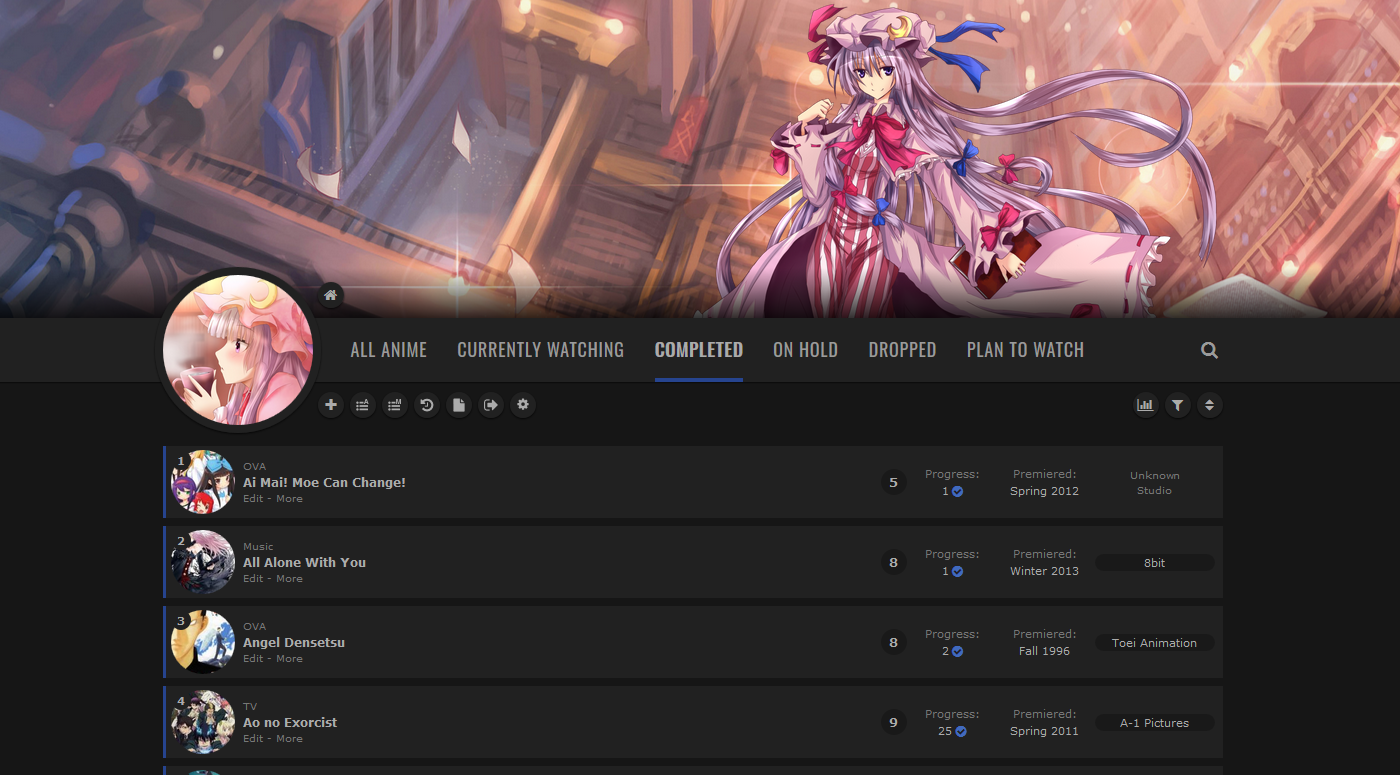 @\import "https://valeriolyndon.github.io/MAL-Public-List-Designs/Clarity%20Theme/Theme%20-%20Compressed.css";
@\import "https://valeriolyndon.github.io/MAL-Public-List-Designs/Clarity%20Theme/Mod%20-%20Dark%20Mode%20Compressed.css";
@\import "https://malscraper.azurewebsites.net/covers/auto/presets/dataimagelinkbefore";
@\import "https://valeriolyndon.github.io/MAL-Public-List-Designs/Clarity%20Theme/Mod%20-%20Hover%20Image%20On%20Circle%20Compressed.css";
:root { --name: "Testy\a Otaku"; }
:root { --avatar: url(https://i.imgur.com/zIfmSCz.png); }
:root { --banner: url(https://i.imgur.com/RdJhLlo.png); }
:root { --character: url(https://i.imgur.com/qm6vf76.png); }
/* Change width of status bar */
.data.status { width: 3px !important; }
.list-table-data { padding-left: 0px; } |
| 〜 回る、回る、回る、むきゅ!〜 |
Jul 3, 2019 12:06 PM
#254

| I want to change the font colors, is it possible? |
 In most cases, the MAL Average Scores don't mean anything, here is a question: were the works made before 2000 all shit? Why are they so damn scarce in the Top 50? Think about how MAL is quite literally a filtered amount of the Anime fanbase. Here's a timeline of the Top 15 in which you can check that, almost always, the scores are affected by the freshness, popularity and other factors that have nothing to do with quality. |
Jul 3, 2019 7:01 PM
#255
DooMWhite said: Have you checked out the "Change theme colours" spoiler on the main forum post? You can change any colour using that, so it'd be a good place to start. If you need more precise control of colours — say, changing a specific instance of text instead of all of it — then I can definitely assist there.I want to change the font colors, is it possible? |
Valerio_LyndonJul 3, 2019 7:28 PM
Jul 3, 2019 7:25 PM
#256
TestyOtaku said: Hmm, when I view your list or use your code on my own list it appears fine. Not quite sure what's causing your issue. If you visit my mangalist, can you see my name or is it also bugged? Do you know what operating system, web browser and version of that browser you are using? You might also try temporarily disabling browser extensions and reloading the page to see if it displays.… My username that's supposed to appear on the banner is suddenly gone. It's been a long while since I've made any edits, so I don't think that's the issue. … |
Jul 3, 2019 8:20 PM
#257
Valerio_Lyndon said: Hmm, when I view your list or use your code on my own list it appears fine. Not quite sure what's causing your issue. If you visit my mangalist, can you see my name or is it also bugged? Do you know what operating system, web browser and version of that browser you are using? You might also try temporarily disabling browser extensions and reloading the page to see if it displays. Hm, looking at it now, everything seems to be working. On both, my list and yours. I did have an adblocker auto-update itself during the issue, but as far as I can tell, it didn't affect the name in any way. I have also closed and re-opened my browser multiple times today. Whereas my laptop has been in sleep mode a few times during the day, but not completely shut. If it's of any use in preventing this kinda stuff in the future, I'm running Firefox Quantum (v 67.0.4) on Windows 7 Home Premium. Though my best guess is that this was all an issue on MAL's end, which they managed to fix just before you checked my list. :P But yeah, thanks for the tips! I'll try 'em if this issue ever resurfaces. Also, that's a beautiful manga list you've got there. I love that wintry scene. And Yui looks really cute. ^-^ |
TestyOtakuJul 3, 2019 8:24 PM
| 〜 回る、回る、回る、むきゅ!〜 |
Jul 3, 2019 8:27 PM
#258
Valerio_Lyndon said: DooMWhite said: Have you checked out the "Change theme colours" spoiler on the main forum post? You can change any colour using that, so it'd be a good place to start. If you need more precise control of colours — say, changing a specific instance of text instead of all of it — then I can definitely assist there.I want to change the font colors, is it possible? Oh, you changed the main post already :P. |
In most cases, the MAL Average Scores don't mean anything, here is a question: were the works made before 2000 all shit? Why are they so damn scarce in the Top 50? Think about how MAL is quite literally a filtered amount of the Anime fanbase. Here's a timeline of the Top 15 in which you can check that, almost always, the scores are affected by the freshness, popularity and other factors that have nothing to do with quality. |
Jul 5, 2019 12:32 PM
#259

| I had a problem adding character renders beside the list because of the high banner, and so I came up with a solution and thought I'll share it here in case anybody will ever need it. /*==FOR HIGH BANNER==*/ .status-menu-container:after { content: ""; position: absolute; top: 150px; /*Change position Y*/ left: -550px; /*Change position X*/ background: url(URLHERE) no-repeat; /*Image here*/ height: 1000px; /*Change to image height*/ width: 706px; /*Change to image width*/ transform: scale(.6); /*Change image size*/ z-index: -1; transition: .4s ease-in-out; } .status-menu-container.fixed:after { left: -150px; transition: 1s ease-in-out; } |
YairPeretzJul 5, 2019 1:04 PM
 |
Jul 5, 2019 6:34 PM
#260
YairPeretz said: Hm, making the render start scrolling when the header does is quite clever. I like it. :)I had a problem adding character renders beside the list because of the high banner, and so I came up with a solution and thought I'll share it here in case anybody will ever need it. /*==FOR HIGH BANNER==*/ .status-menu-container:after { content: ""; position: absolute; top: 150px; /*Change position Y*/ left: -550px; /*Change position X*/ background: url(URLHERE) no-repeat; /*Image here*/ height: 1000px; /*Change to image height*/ width: 706px; /*Change to image width*/ transform: scale(.6); /*Change image size*/ z-index: -1; transition: .4s ease-in-out; } .status-menu-container.fixed:after { left: -150px; transition: 1s ease-in-out; } |
Jul 5, 2019 6:54 PM
#261
Valerio_Lyndon said: YairPeretz said: Hm, making the render start scrolling when the header does is quite clever. I like it. :)I had a problem adding character renders beside the list because of the high banner, and so I came up with a solution and thought I'll share it here in case anybody will ever need it. /*==FOR HIGH BANNER==*/ .status-menu-container:after { content: ""; position: absolute; top: 150px; /*Change position Y*/ left: -550px; /*Change position X*/ background: url(URLHERE) no-repeat; /*Image here*/ height: 1000px; /*Change to image height*/ width: 706px; /*Change to image width*/ transform: scale(.6); /*Change image size*/ z-index: -1; transition: .4s ease-in-out; } .status-menu-container.fixed:after { left: -150px; transition: 1s ease-in-out; } Thank you. ^^ |
|
Jul 6, 2019 4:51 PM
#262
| Is there a way to make the name start sliding from the middle instead from the top without moving the whole container? It just keeps sliding from the top and only then to the middle. EDIT: Never mind I got it. |
YairPeretzJul 6, 2019 5:06 PM
|
Jul 6, 2019 4:57 PM
#263

| @YairPeretz wow your version of the layout is really cool! 😎 |
Jul 6, 2019 5:08 PM
#264
Haha thank you. I worked on it for a while. ^^ |
|
Jul 10, 2019 9:58 AM
#265

| The large covers suddenly not working, everything was working perfectly since I started using the layout, someone has the same issue? |
Jul 10, 2019 1:37 PM
#266
Acruxx said: Hm, I have the same issue. The cover generator used for high-resolution images appears to be broken. I am unsure why or if this will resolve itself. For now, feel free to use this replacement version.The large covers suddenly not working, everything was working perfectly since I started using the layout, someone has the same issue? This is a manually-mantained file, there could be the occasional image missing — especially newer releases. If you do come across any blurry images, you can let me know via my profile and I'll add them to the list. To Install:
Thanks for bringing this to my attention. :) |
Jul 11, 2019 11:58 AM
#267
Hey, how did you make the cover bigger i'd like to make mine bigger aswell :P Valerio_Lyndon said: If you need more precise control of colours — say, changing a specific instance of text instead of all of it — then I can definitely assist there. I managed to change to color for the tags, but how do i place them under "edit" and "more" instead of the right side ? one of the pictures in the album has it showing |
Jul 11, 2019 10:13 PM
#268
ItsOrga said: Add this to the bottom of your CSS. Then modify the top-most number as you wish. The default is 318px. Make sure not to delete the "px" at the end, it is required.Hey, how did you make the cover bigger i'd like to make mine bigger aswell :P /* ====================
Change Banner Height */
:root { --banner-height: 318px; }
.cover-block { height: var(--banner-height); }
.header { margin-top: calc(var(--banner-height) - 36px); }
.list-stats { top: calc(var(--banner-height) + 98px); }ItsOrga said: Check the "Horizontal Tags" section within the "Tweaks from my own personal list" spoiler, it's at the bottom of the modifications in the main post.I managed to change to color for the tags, but how do i place them under "edit" and "more" instead of the right side ? one of the pictures in the album has it showing |
Jul 14, 2019 3:40 PM
#269
Valerio_Lyndon said: Add this to the bottom of your CSS. Then modify the top-most number as you wish. The default is 318px. Make sure not to delete the "px" at the end, it is required. /* ====================
Change Banner Height */
:root { --banner-height: 318px; }
.cover-block { height: var(--banner-height); }
.header { margin-top: calc(var(--banner-height) - 36px); }
.list-stats { top: calc(var(--banner-height) + 98px); }Check the "Horizontal Tags" section within the "Tweaks from my own personal list" spoiler, it's at the bottom of the modifications in the main post. Thank you very much ! |
Aug 3, 2019 4:51 AM
#270

| Hello! I was wondering how could I make the renders a bit brighter and to be "on top" of the list and not in the "background layer". The thing is my screen is quite small so I don't get a lot of space between the list items and the actual border of my screen, so the renders get covered by the list. It would also work to make the item list smaller (less width). BTW I don't mind the render covering a bit of an item of the list Also, how can I change the color of the little plus icon when hovering over?  |
Yta_kawaiiAug 3, 2019 7:38 AM
Aug 3, 2019 11:56 PM
#271
| @Yta_kawaii There's a couple of things you could do. To change the list's width, this should work assuming I haven't forgotten anything: Add to bottom of code, then change the "900px" at the top of this snippet to whatever number you want. Default is 1060px. /* Change list width */
:root {
--list-width: 900px;
}
.list-table {
width: var(--list-width);
}
.list-table-data {
max-width: var(--list-width);
}
.data.tags a.edit {
right: calc(var(--list-width) * -1)
}/* Reposition renders */
footer::before, footer::after {
left: initial;
right: initial;
z-index: initial;
pointer-events: none;
} footer::before {
left: 0;
} footer::after {
right: 0;
}/* Reposition renders */
footer::before, footer::after {
left: initial;
right: initial;
z-index: 400;
pointer-events: none;
} footer::before {
left: 0;
} footer::after {
right: 0;
}That icon is controlled by "--text-h". You can either find that near the top of the CSS and change it or add this to the bottom of your CSS to change this specific text: .list-table .list-table-data .data [class^="icon-add-"]:hover {
color: #9999dd !important;
} |
Aug 4, 2019 5:15 AM
#272
Valerio_Lyndon said: @Yta_kawaii There's a couple of things you could do. To change the list's width, this should work assuming I haven't forgotten anything: Add to bottom of code, then change the "900px" at the top of this snippet to whatever number you want. Default is 1060px. /* Change list width */
:root {
--list-width: 900px;
}
.list-table {
width: var(--list-width);
}
.list-table-data {
max-width: var(--list-width);
}
.data.tags a.edit {
right: calc(var(--list-width) * -1)
}/* Reposition renders */
footer::before, footer::after {
left: initial;
right: initial;
z-index: initial;
pointer-events: none;
} footer::before {
left: 0;
} footer::after {
right: 0;
}/* Reposition renders */
footer::before, footer::after {
left: initial;
right: initial;
z-index: 400;
pointer-events: none;
} footer::before {
left: 0;
} footer::after {
right: 0;
}That icon is controlled by "--text-h". You can either find that near the top of the CSS and change it or add this to the bottom of your CSS to change this specific text: .list-table .list-table-data .data [class^="icon-add-"]:hover {
color: #9999dd !important;
}Thank you so much! Just in case I sometime want to, is there any way to change the height of the items? Not the total height of the list but the individual height of every item so they look more narrow (in bulk of course, not 1 by 1 haha) And also I was tweaking colors but I didn't manage to see what do these tweak: --textMid --textDim --textProminent --textLinkHov --bg-dark --text-dark --icon --btn-head-bg-h |
Aug 5, 2019 2:53 AM
#273
Yta_kawaii said: is there any way to change the height of the items? This is probably about as compact as the list items can get without a full redesign of the theme. It compacts a lot of the items and shrinks the images. This is tailored to your currently enabled list columns, I have not accounted for any others that are not enabled right now. 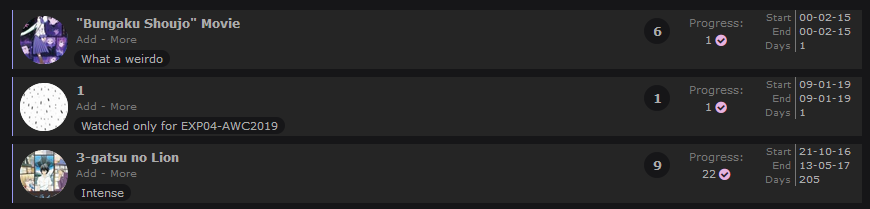 Add to the bottom of your CSS. /* Make list items shorter */
.list-table-data {
padding-bottom: 17px;
min-height: 42px;
}
.data.image {
margin-top: 2px;
margin-bottom: -15px;
}
.data.title {
padding-top: 16px !important;
}
.data.title .link.sort {
top: 0;
}
.data.started {
top: -14px;
}
.data.days {
top: 14px;
}
.data.tags div {
margin-left: 62px;
}
/* Change image size */
.data.image, .data.image img {
width: 48px !important;
height: 48px !important;
}
.data.image a::after {
font-size: 24px;
line-height: 48px;
}Yta_kawaii said: I was tweaking colors but I didn't manage to see what do these tweak: --textMid --textDim --textProminent --textLinkHov --bg-dark --text-dark --icon --btn-head-bg-h Some of those colours are leftovers due to the rather quick and dirty way I combined the themes. If I remember correctly, "textMid" is not used in this mashup theme. On the normal version of Brink, it's used for some text that requires less contrast in the filter menu. "textDim" is used on the footer text. On the normal version of Brink, it's used for the header too. "textProminent" is also not used here. Usually used on Brink list items. "textLinkHov" is used on some basic links, such as the header links when viewed by a non-list-owner. Usually used on Brink list items too. "bg-dark" is used on a few input field borders, such as the tag edit box. "text-dark" is used in the filter menu and the "more" section of anime/manga entries. "icon" is used in the filter menu on the little question mark icons. "btn-head-bg-h" is not used in the mashup. Usually used on Clarity header elements. The variables that don't do anything are simply ones that I forgot to remove while combining the two themes. |
Aug 5, 2019 11:12 AM
#274
| Man this was really fun to mess around with while waiting for a anime episode. Thank you so much for the template and I learned a little about CSS that I might get more into :) |
Aug 5, 2019 12:44 PM
#275
Valerio_Lyndon said: Yta_kawaii said: is there any way to change the height of the items? This is probably about as compact as the list items can get without a full redesign of the theme. It compacts a lot of the items and shrinks the images. This is tailored to your currently enabled list columns, I have not accounted for any others that are not enabled right now. Add to the bottom of your CSS. /* Make list items shorter */
.list-table-data {
padding-bottom: 17px;
min-height: 42px;
}
.data.image {
margin-top: 2px;
margin-bottom: -15px;
}
.data.title {
padding-top: 16px !important;
}
.data.title .link.sort {
top: 0;
}
.data.started {
top: -14px;
}
.data.days {
top: 14px;
}
.data.tags div {
margin-left: 62px;
}
/* Change image size */
.data.image, .data.image img {
width: 48px !important;
height: 48px !important;
}
.data.image a::after {
font-size: 24px;
line-height: 48px;
}Yta_kawaii said: I was tweaking colors but I didn't manage to see what do these tweak: --textMid --textDim --textProminent --textLinkHov --bg-dark --text-dark --icon --btn-head-bg-h Some of those colours are leftovers due to the rather quick and dirty way I combined the themes. If I remember correctly, "textMid" is not used in this mashup theme. On the normal version of Brink, it's used for some text that requires less contrast in the filter menu. "textDim" is used on the footer text. On the normal version of Brink, it's used for the header too. "textProminent" is also not used here. Usually used on Brink list items. "textLinkHov" is used on some basic links, such as the header links when viewed by a non-list-owner. Usually used on Brink list items too. "bg-dark" is used on a few input field borders, such as the tag edit box. "text-dark" is used in the filter menu and the "more" section of anime/manga entries. "icon" is used in the filter menu on the little question mark icons. "btn-head-bg-h" is not used in the mashup. Usually used on Clarity header elements. The variables that don't do anything are simply ones that I forgot to remove while combining the two themes. Thank you so much once again! I really appreciate that you mashed the two themes as requested. Also never mind about the "leftover" bits I was actually able to tweak everything I liked and even went deeper into the customization by changing which color variables affected which items n.n' |
Aug 7, 2019 7:59 AM
#276

| Hey, I've been using your layout for a while now but never could really figure out how to make some tweaks I really liked. 1. I would like to add a colored border to the header part with the categories button like in the pic below  2. I would like my avatar to remain clickable after scrolling down. Could you help me with these? Thanks! :P |
 🌺 Anime List 🌺 🌺 Cards Collection 🌺 |
Aug 7, 2019 7:17 PM
#277
| @Leguch You find code for the border in the spoiler below. Add to the bottom of your CSS. You can change the colour by modifying the "#9ca5fe" near the top of this snippet. Any valid CSS colour is acceptable. Google "css color picker" for help. /* ====================
ADD BORDER TO HEADER */
:root {
/* Change colour of border using this variable. */
--header-border: #9ca5fe;
}
.status-menu-container:before {
height: 56px;
border-width: 4px 0;
border-style: solid;
border-color: var(--header-border);
}
.status-menu:after {
left: -4px;
top: -47px;
border-width: 4px;
box-shadow: 0 0 0 4px var(--header-border);
} .fixed .status-menu:after {
top: 4px;
}Your second request is unfortunately not possible, or I would have done so during the initial implementation. |
Aug 8, 2019 2:45 AM
#278
Valerio_Lyndon said: @Leguch You find code for the border in the spoiler below. Add to the bottom of your CSS. You can change the colour by modifying the "#9ca5fe" near the top of this snippet. Any valid CSS colour is acceptable. Google "css color picker" for help. /* ====================
ADD BORDER TO HEADER */
:root {
/* Change colour of border using this variable. */
--header-border: #9ca5fe;
}
.status-menu-container:before {
height: 56px;
border-width: 4px 0;
border-style: solid;
border-color: var(--header-border);
}
.status-menu:after {
left: -4px;
top: -47px;
border-width: 4px;
box-shadow: 0 0 0 4px var(--header-border);
} .fixed .status-menu:after {
top: 4px;
}Your second request is unfortunately not possible, or I would have done so during the initial implementation. Thanks a lot! |
🌺 Anime List 🌺 🌺 Cards Collection 🌺 |
Aug 17, 2019 6:29 AM
#280
| Hi everyone, how can i add that under the cover what is written in the tag is shown (be careful! i don't want the tag table to be removed)? i ask you why i am inexperienced ps: in case there may be useful use the hover on circle version I apologize for my english, i am italian Edit: if i don't ask too much you could do that the code you posted on the name ADD BORDER TO HEADER changes color in each category? let me explain better, if i go on to all anime the border is shown in orange while if i go in the category currenty watching it is shown in red color also if possible i would like that over the edge also changes the color of all anime, currenty watching etc. You put them in different colors so i look better and change them first.I currently use this code : @import "https://malscraper.azurewebsites.net/covers/auto/presets/dataimagelinkbefore"; @import "https://valeriolyndon.github.io/MAL-Public-List-Designs/Clarity%20Theme/Theme%20-%20Compressed.css"; @import "https://valeriolyndon.github.io/MAL-Public-List-Designs/Clarity%20Theme/Mod%20-%20Dark%20Mode%20Compressed.css"; :root { --avatar: url(https://cdn.myanimelist.net/images/userimages/6526888.jpg); } :root { --banner: url(https://coverfiles.alphacoders.com/589/58902.jpg); } :root { --character: none; } /* "Clarity" Modification by Valerio Lyndon / Hover Image on Circle / Revision 0.3 */ .data.image a{overflow:visible}.data.image a:before{content:"";position:absolute;top:50%;left:-166px;z-index:50;width:150px;height:0;background:var(--bg-dark) no-repeat center/cover;border-radius:8px;box-shadow:0 0 2px #000;opacity:0;pointer-events:none;transition:all .3s ease}.data.image:hover a:before{top:calc(50% - 100px);height:200px;opacity:1}.data.image a:after,.data.image img{border-radius:50%} /* ==================== ADD BORDER TO HEADER */ :root { /* Change colour of border using this variable. */ --header-border: #9ca5fe; } .status-menu-container:before { height: 56px; border-width: 4px 0; border-style: solid; border-color: var(--header-border); } .status-menu:after { left: -4px; top: -47px; border-width: 4px; box-shadow: 0 0 0 4px var(--header-border); } .fixed .status-menu:after { top: 4px; } Edit 2: can you make it possible to write tags without the edit button? as a standard theme practically |
TaduinAug 17, 2019 1:43 PM
Aug 17, 2019 6:45 PM
#281
Taduin said: Do you mean...how can i add that under the cover what is written in the tag is shown (be careful! i don't want the tag table to be removed)? ps: in case there may be useful use the hover on circle version  /* =================
REPOSITIONED TAGS */
.data.tags {
position: absolute;
width: 0;
height: 100%;
padding: 0 !important;
}
.list-table-data {
padding-bottom: 0;
}
.data.tags div {
position: relative;
left: -158px;
top: calc(50% + 8px);
width: 150px;
opacity: 0;
transition: all 0.3s ease;
pointer-events: none;
} .image:hover ~ .data.tags div {
opacity: 1;
top: calc(50% + 108px);
}
.data.tags span {
padding: 0 0 4px;
}
.data.tags span a {
background: var(--bg) !important;
}
.data.tags a.edit { right: -1060px; }
.data.tags textarea { right: -1056px; } /* Horizontal Tags / Revision 0.2 */
.list-table-data {
padding-bottom: 11px;
}
.data.tags {
position: absolute;
left: 0;
top: 0;
display: flex !important;
width: 0;
height: 100%;
padding: 0 !important;
align-items: flex-end;
}
.data.tags div {
max-width: 980px;
margin: 0 0 4px 80px;
font-size: 0;
white-space: nowrap;
}
.data.tags span {
display: inline-block;
padding: 0;
}
.data.tags span a {
padding: 1px 8px !important;
margin: 0 4px 0 0;
white-space: nowrap;
}
.data.tags span a[href*="=Favo"] {
padding: 0 !important;
}
.data.tags a.edit { right: -1060px; }
.data.tags textarea { right: -1060px; }Taduin said: Here's an alternate version that will do so:if i don't ask too much you could do that the code you posted on the name ADD BORDER TO HEADER changes color in each category? /* ===================
ADD BORDER TO HEADER
category colour ver */
[data-query*='status":7'] {
--header-border: var(--accent);
} [data-query*='status":1'] {
--header-border: var(--watching);
} [data-query*='status":2'] {
--header-border: var(--completed);
} [data-query*='status":3'] {
--header-border: var(--onhold);
} [data-query*='status":4'] {
--header-border: var(--dropped);
} [data-query*='status":6'] {
--header-border: var(--plantowatch);
}
.status-menu-container:before {
height: 56px;
border-width: 4px 0;
border-style: solid;
border-color: var(--header-border);
}
.status-menu:after {
left: -4px;
top: -47px;
border-width: 4px;
box-shadow: 0 0 0 4px var(--header-border);
} .fixed .status-menu:after {
top: 4px;
}Taduin said: Check the right side of list items:can you make it possible to write tags without the edit button? as a standard theme practically  |
Aug 18, 2019 2:22 AM
#282
| First of all thanks for the help. So to add the text from the right i did not know it, but for the tag on the left side it is fine but i would like the general position to be left too, i would like to see it on both sides if possible. Edit: how can i change color to a category? if i try to change the word var it will not change anything if i insert the hml color code, i would also like it to change the color of the category name too, place a screen i took from a user  |
TaduinAug 18, 2019 10:31 AM
Aug 18, 2019 11:01 PM
#283
Taduin said: I'm sorry, I don't quite understand. Could you rephrase?So to add the text from the right i did not know it, but for the tag on the left side it is fine but i would like the general position to be left too, i would like to see it on both sides if possible. Taduin said: Add to bottom of CSS:i would also like it to change the color of the category name too, place a screen i took from a user /* ====================
Add Colour To Header */
.status-menu .status-button {
transition: color 0.3s ease;
}
/* All Anime */
.status-menu .status-button:nth-of-type(1):hover,
.status-menu .status-button.on:nth-of-type(1) {
color: var(--accent) !important;
}
/* Watching */
.status-menu .status-button:nth-of-type(2):hover,
.status-menu .status-button.on:nth-of-type(2) {
color: var(--watching) !important;
}
/* Completed */
.status-menu .status-button:nth-of-type(3):hover,
.status-menu .status-button.on:nth-of-type(3) {
color: var(--completed) !important;
}
/* On Hold */
.status-menu .status-button:nth-of-type(4):hover,
.status-menu .status-button.on:nth-of-type(4) {
color: var(--onhold) !important;
}
/* Dropped */
.status-menu .status-button:nth-of-type(5):hover,
.status-menu .status-button.on:nth-of-type(5) {
color: var(--dropped) !important;
}
/* Planned */
.status-menu .status-button:nth-of-type(6):hover,
.status-menu .status-button.on:nth-of-type(6) {
color: var(--plantowatch) !important;
}Taduin said: You have two options:how can i change color to a category? This will change the status colours everywhere they appear. Just change them how you want. :root {
--accent: #4065ba;
--watching: #2db039;
--completed: #26448f;
--onhold: #f1c83e;
--dropped: #a12f31;
--plantowatch: #c3c3c3;
}To change specific instances, change "var(--word)" to any colour. For example: "red" or "#fc98e7". So this: --header-border: var(--accent); Becomes this: --header-border: #ffc9be; |
Aug 19, 2019 3:42 AM
#284
First of all, as always, thank you for these codes, I love both the theme and the support you offer, I asked for support in another topic and for four days they have given me no support. I actually expressed myself badly and then joined the translation of google translate and behold that you don't understand u.u, in practice I want the tags to come out both under the cover of the image preview and in the table pane (now to avoid misleading the screen of this part).  now i write it to avoid translation problems, i want it to remain in this position as well as i want it to go below the previews of the images that come out on the left, in practice in both parts Having said that i want to give you some advice, why don't you put these codes in the other installation codes? I think people like it, from that extra touch u.u |
Aug 20, 2019 2:19 AM
#285
| Hey VL! Really liking your work and themes. I was wondering if it would be possible to customize the scrollbar for this theme the way it's present in your other theme "Brink"? Would be cool. |
Aug 20, 2019 2:40 AM
#286
Taduin said: Ah, I see. Unfortunately, that's beyond the capability of CSS. I can move and alter things to an extent, but duplicating or creating new elements is beyond my power.I want the tags to come out both under the cover of the image preview and in the table pane (now to avoid misleading the screen of this part). Taduin said: I was thinking the same thing! I just have to set aside some time for it. :) why don't you put these codes in the other installation codes? I think people like it, from that extra touch u.u |
Aug 20, 2019 3:02 AM
#287
Egotistical said: Glad you are enjoying it, and indeed it is. :) You could give this a shot and let me know if it looks alright to you. Add to the bottom of the code same as usual.Hey VL! Really liking your work and themes. I was wondering if it would be possible to customize the scrollbar for this theme the way it's present in your other theme "Brink"? Would be cool. /* ==================
RESTYLE SCROLLBARS */
/* Firefox */
* {
scrollbar-color: var(--text) var(--bg);
}
/* Chrome */
*::-webkit-scrollbar {
background: var(--bg);
}
*::-webkit-scrollbar-button:vertical {
background: transparent center / 10px auto no-repeat;
} *::-webkit-scrollbar-button:vertical:start {
background-image: url(https://i.imgur.com/Cu2u9Hu.png);
} *::-webkit-scrollbar-button:vertical:end {
background-image: url(https://i.imgur.com/0YI7VxA.png);
} *::-webkit-scrollbar-button:horizontal {
background: transparent center / auto 10px no-repeat;
} *::-webkit-scrollbar-button:horizontal:start {
background-image: url(https://i.imgur.com/BArw1oI.png);
} *::-webkit-scrollbar-button:horizontal:end {
background-image: url(https://i.imgur.com/vqOtoms.png);
}
*::-webkit-scrollbar-corner {
background: var(--bg);
}
*::-webkit-scrollbar-thumb {
background: var(--text) content-box;
border: 0 solid transparent;
} *::-webkit-scrollbar-thumb:vertical {
border-width: 0 2px;
} *::-webkit-scrollbar-thumb:horizontal {
border-width: 2px 0;
} *::-webkit-scrollbar-thumb:hover {
background-color: var(--text-dim);
}
*::-webkit-scrollbar-track {
width: 5px;
} |
Aug 20, 2019 3:21 AM
#288
Valerio_Lyndon said: Egotistical said: Glad you are enjoying it, and indeed it is. :) You could give this a shot and let me know if it looks alright to you. Add to the bottom of the code same as usual.Hey VL! Really liking your work and themes. I was wondering if it would be possible to customize the scrollbar for this theme the way it's present in your other theme "Brink"? Would be cool. /* ==================
RESTYLE SCROLLBARS */
/* Firefox */
* {
scrollbar-color: var(--text) var(--bg);
}
/* Chrome */
*::-webkit-scrollbar {
background: var(--bg);
}
*::-webkit-scrollbar-button:vertical {
background: transparent center / 10px auto no-repeat;
} *::-webkit-scrollbar-button:vertical:start {
background-image: url(https://i.imgur.com/Cu2u9Hu.png);
} *::-webkit-scrollbar-button:vertical:end {
background-image: url(https://i.imgur.com/0YI7VxA.png);
} *::-webkit-scrollbar-button:horizontal {
background: transparent center / auto 10px no-repeat;
} *::-webkit-scrollbar-button:horizontal:start {
background-image: url(https://i.imgur.com/BArw1oI.png);
} *::-webkit-scrollbar-button:horizontal:end {
background-image: url(https://i.imgur.com/vqOtoms.png);
}
*::-webkit-scrollbar-corner {
background: var(--bg);
}
*::-webkit-scrollbar-thumb {
background: var(--text) content-box;
border: 0 solid transparent;
} *::-webkit-scrollbar-thumb:vertical {
border-width: 0 2px;
} *::-webkit-scrollbar-thumb:horizontal {
border-width: 2px 0;
} *::-webkit-scrollbar-thumb:hover {
background-color: var(--text-dim);
}
*::-webkit-scrollbar-track {
width: 5px;
}Your code works great! Much appreciated. |
Aug 20, 2019 3:49 AM
#289
| Thanks for everything, we're almost done, the last things are missing now! 1) since I added the Add Color To Header function when i go over the anime title (I also think manga but don't follow them) the text turns orange as i changed the accent in this color --accent: #FF4500; , would it be possible to return the normal color of the text over the anime or change the color for each type of section? for example of all anime it becomes orange, on currently watch green etc without removing this feature? 2) how do you know how to add a tag, you have to go right, don't you? would it be possible to insert that to add the tag just go over the tag section and remove the one on the right? as the standard theme with "edit" done these two things i finished, thanks for everything |
Aug 21, 2019 12:34 AM
#290
Taduin said: Sure. First, delete the line changing --accent so that the titles stay the same. Then, change the colour of the header directly using this code:1) since I added the Add Color To Header function when i go over the anime title (I also think manga but don't follow them) the text turns orange as i changed the accent in this color --accent: #FF4500; , would it be possible to return the normal color of the text over the anime or change the color for each type of section? for example of all anime it becomes orange, on currently watch green etc without removing this feature? /* Change colour of specifically the header all anime button */
:root {
--head-accent: #FF4500;
}
.status-menu .status-button:nth-of-type(1):hover,
.status-menu .status-button.on:nth-of-type(1) {
color: var(--head-accent) !important;
}
.status-menu .status-button:nth-of-type(1)::after {
background: var(--head-accent) !important;
}Taduin said: Like this?2) how do you know how to add a tag, you have to go right, don't you? would it be possible to insert that to add the tag just go over the tag section and remove the one on the right? as the standard theme with "edit"  /* ==============================
Reposition Tags Back to Normal */
.data.tags a.edit {
position: static;
width: 50% !important;
border-radius: 8.5px;
margin: 1px 0 1px 25%;
color: var(--text) !important;
font-size: 11px !important;
line-height: 15px;
font-family: Verdana, Arial, sans-serif !important;
text-align: center !important;
opacity: 1 !important;
} .list-item:hover .data.tags a.edit:hover {
width: 50% !important;
background: var(--btn-bg-h);
color: var(--btn-text-h) !important;
}
.data.tags a.edit::after {
content: none;
} |
Aug 21, 2019 2:23 AM
#291
| For the first code i didn't understand what to do exactly, i tried to remove that accent line and add this one but it comes out blue now, can you give me the complete code you with the possibility to change color? The second perfect code. After the first code i would like after the shared anime and history button there is the viewing profile button with the green hover above when you pass us like the other buttons of that area |
Aug 21, 2019 3:44 AM
#292
| Responding from the other thread... Ashtwich said: How do i change the font color of my user name on the cover ? for example its white and i have a white colored cover photo and i want my username in black color. how do i do it? Add this code to the bottom of your CSS and then change the two "#colour"'s to any valid CSS colour. The first is the text colour, the second is the text shadow. #cover-image-container::after {
color: #2f2a22;
text-shadow: 2px 2px 8px #020202;
} |
Aug 21, 2019 5:03 AM
#293
| How much you have not understood because of the translator and you can't understand what i say. When i go above the title of an anime the text changes color since i added the the function of the edges (basic only the ADD BORDER TO HEADER would be blue but when i added the function Add Color To Header function orange), in this case since i have this code --accent: #FF4500; the title of the anime when i pass over it turns orange.If i remove it from orange it turns blue, how can i set that if for example I have an orange anime section the hover text turns orange when i'm in the watching section the text turns green and so on? we can't understand each other for the translator. I also have another request if possible, can you move higher air date and insert slightly under the function premiered? |
TaduinAug 21, 2019 5:09 AM
Aug 21, 2019 5:33 AM
#294

Valerio_Lyndon said: Responding from the other thread... Ashtwich said: How do i change the font color of my user name on the cover ? for example its white and i have a white colored cover photo and i want my username in black color. how do i do it? Add this code to the bottom of your CSS and then change the two "#colour"'s to any valid CSS colour. The first is the text colour, the second is the text shadow. #cover-image-container::after {
color: #2f2a22;
text-shadow: 2px 2px 8px #020202;
}Thanks it worked. i am still new to this platform so trying to figure out things. |
Aug 21, 2019 9:46 AM
#295
Is there a way to change the highlight color for the text on the banner? I would also like to change the color of stuff like studio names or ratings on hover 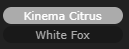 Last thing is I managed to recolor most of the stuff for different categories (menu buttons, filter etc etc) however due to my 0 knowledge of css I changed some stuff within the main theme, it works fine and there are no issues with it but I was wondering if there's a way to get the exact same effect I currently have on my list without modifying the main theme, just so the code is cleaner maybe, I could provide you with the code for my list if that wouldn't be too much of a hassle to look it up for you. Thanks~ ;p |
🌺 Anime List 🌺 🌺 Cards Collection 🌺 |
Aug 21, 2019 10:31 AM
#296
| @Leguch Sorry, how can you change the color of the hover of the anime title for each different section? like currently watching the hover turns green, completed the hover turns blue and so on edit: if i don't ask too much, will you also give me the code of the sidebar that changes color depending on the section? |
TaduinAug 21, 2019 10:49 AM
Aug 21, 2019 10:53 AM
#297
Taduin said: @Leguch Sorry, how can you change the color of the hover of the anime title for each different section? like currently watching the hover turns green, completed the hover turns blue and so on edit: if i don't ask too much, will you also give me the code of the sidebar that changes color depending on the section? Thing is I don't really remember what I changed exactly, that's why I'm trying to get a simpler version |
🌺 Anime List 🌺 🌺 Cards Collection 🌺 |
Aug 21, 2019 11:08 AM
#298
| Thanks all the same, maybe Valerio takes a look and gives us the code |
Aug 21, 2019 8:24 PM
#299
Taduin said: This?After the first code i would like after the shared anime and history button there is the viewing profile button with the green hover above when you pass us like the other buttons of that area  It's disabled on this theme due to my repurposing it. Were I to restore it to its location, the avatar would no longer be clickable. But it is possible. Taduin said: I didn't mean to insult you by answering someone else first. I have limited time to answer everything so sometimes I get around to easy questions first.How much you have not understood because of the translator and you can't understand what i say. … we can't understand each other for the translator. Taduin said: For the first code i didn't understand what to do exactly, i tried to remove that accent line and add this one but it comes out blue now, can you give me the complete code you with the possibility to change color? Taduin said: Sort of like this?how can i set that if for example I have an orange anime section the hover text turns orange when i'm in the watching section the text turns green and so on?  If that looks good, use this code: /* ===================================
Anime title color based on category */
.list-table .list-table-data .watching ~ .title .link:hover,
.list-table .list-table-data .reading ~ .title .link:hover {
color: var(--watching) !important;
} .list-table .list-table-data .completed ~ .title .link:hover {
color: var(--completed) !important;
} .list-table .list-table-data .onhold ~ .title .link:hover {
color: var(--onhold) !important;
} .list-table .list-table-data .dropped ~ .title .link:hover {
color: var(--dropped) !important;
} .list-table .list-table-data .plantowatch ~ .title .link:hover,
.list-table .list-table-data .plantoread ~ .title .link:hover {
color: var(--plantowatch) !important;
}Taduin said: Like so?I also have another request if possible, can you move higher air date and insert slightly under the function premiered? 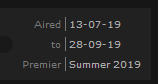 /* ==================================
Reposition Premiered next to Aired */
.data.airing-started {
top: -20px;
margin-left: -130px;
}
.data.airing-finished {
top: 0;
margin-left: -130px;
}
.data.airing-started,
.data.airing-finished,
.data.season {
width: 130px;
}
.data.season {
position: relative;
top: 20px;
height: 14px;
margin-right: 0;
order: 25;
color: var(--text);
font-size: 9px;
line-height: 14px;
text-align: left !important;
text-overflow: ellipsis;
white-space: nowrap;
}
.data.airing-finished::before,
.data.airing-started::before,
.data.season::before {
width: 40px;
border-right: 1px solid var(--text-dim);
text-align: right;
}
.data.season::before {
content: 'Premier';
padding-right: 4px;
display: inline-block;
color: var(--text-dim);
} |
Aug 21, 2019 8:32 PM
#300
Yep, use this to change it to something else. The first three numbers are as follows: horizontal position, vertical position, blur. The last 6 digits with the hashtag (not counting the semi-colon) are the colour. You can use any valid CSS colour.#cover-image-container::after {
text-shadow: 2px 2px 8px #e4bef4;
}You can change it by using this code. Top colour is the background, bottom colour is the text. :root {
--btn-bg-h: #338833;
--btn-text-h: #ffffff;
}To avoid this and only change the tags, studios, etc, use this code instead: .list-item {
--btn-bg-h: #338833;
--btn-text-h: #ffffff;
}Leguch said: Clean is rather subjective. For my own purposes, I would consider clean to be code which has the least overwriting of code, where-as you or someone else may consider clean to be the most readable or modifyable. But it's certainly possible, although would take a little time to separate out what is changed and what isn't. Is there a specific reason you wish to separate it out, such as updating the theme?Last thing is I managed to recolor most of the stuff for different categories (menu buttons, filter etc etc) however due to my 0 knowledge of css I changed some stuff within the main theme, it works fine and there are no issues with it but I was wondering if there's a way to get the exact same effect I currently have on my list without modifying the main theme, just so the code is cleaner maybe, I could provide you with the code for my list if that wouldn't be too much of a hassle to look it up for you. |
More topics from this board
» theme helpthreat - Jul 5 |
5 |
by Zaryf
»»
Aug 21, 5:46 AM |
|
» [CSS] ⭐️ Customize your List Cursor + Cursor FixesShishio-kun - Mar 8, 2021 |
30 |
by Shishio-kun
»»
Jul 28, 3:17 AM |
|
» How To Have Different Banner/Cover image & Background Image For Manga & Anime ListsYasminaRegina - Jul 25 |
2 |
by YasminaRegina
»»
Jul 26, 1:02 AM |
|
Sticky: » 💚 [REPAIR STICKY] Repair/speed up layouts + Request layout fixes ( 1 2 )Shishio-kun - Nov 17, 2023 |
52 |
by LucaBalsa
»»
Jul 6, 2:02 PM |
|
» [CSS/BBCODE] ⭐️ How to view anyone's CSS or BBcodes (for lists, profiles, or clubs)!Shishio-kun - Feb 6, 2012 |
37 |
by sunnysummerday
»»
Jun 11, 7:44 PM |