New
May 27, 2021 7:04 PM
#1
| See the updates and changes in the video here! https://www.youtube.com/watch?v=X5HcnLFpC-k Grid-style Layout 2021 Patch @/import "https://storage.live.com/items/4A07C1EEED420167%21170"; You can add this import to the top of your CSS if you are using the popular Takana No Hana grid style layout before May 2021 and it will send many requested changes, fixes, and updates to your layout (over 30 in all). It's essentially a patch I've been working on for a few months. See the video for the changes and new features! The patch also lets me send updates and fixes to your layout, so if preview pics go down again I can probably send a fix to your layout so you won't have to update preview pics yourself. Anyone using any version of the grid style layout can add the import patch to the top of your CSS. You can also install the new versions of the layout: https://myanimelist.net/forum/?topicid=1640096 The new versions of the grid style layouts have the patch embedded in the code, many new customization options on top, and the CSS is shortened to allow more extensions! One important fix is you can use all settings with the patch! Cursor, avatar, and scores were also fixed. :D 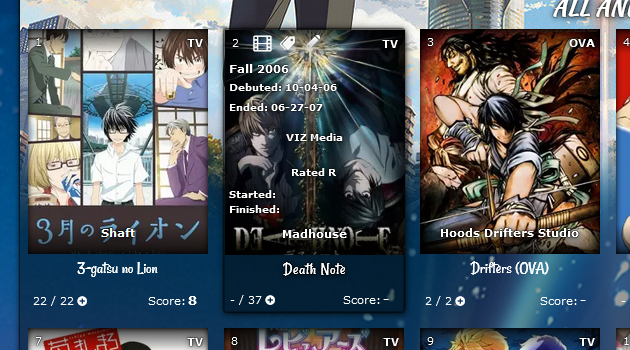 It's also recommended to switch over to the new versions because the codes load much faster due to changes with the preview pics. Thanks for Valerio_Lyndon for the menu adjustment codes, I added them in the patch! New features you can add READ: In order to use the new features, just add the codes for them after using the patch, but you may have to switch over to one of the new versions of the layout since the old versions have limited space for adding codes due to MAL's CSS limit. I highly recommend just switching to a new version linked below to avoid errors and also to use all the features you want! The new versions also have a lot of these features built in to the top of the code. New versions also allow for removing codes to extend space. https://myanimelist.net/forum/?topicid=1640096 Adjust avatar  Add it to the bottom. You may want to change "center center" to "left center" or "right center" to try other positions for it. .list-table .list-table-header:after, .cover-block::after { background-size: cover !important; background-position: center center !important; } Preview Pics go dark on hover 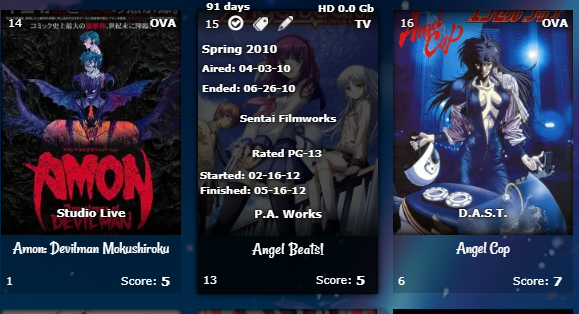 This makes them easier to read when you point the cursor to them. .data.title.clearfix{ height: 283px !important;} .list-table .list-table-data:hover .data.title.clearfix{ transition:all .1s ease-in-out; background-color: rgba(0,0,0,.7) !important; } Mark Anime and Manga with a glow or icons 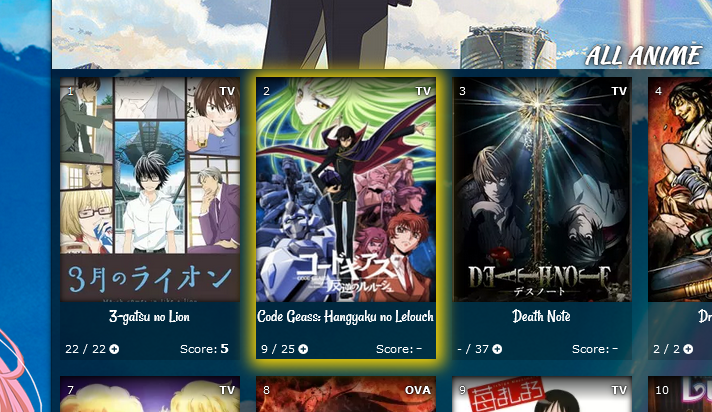 You can pick the color for the glow (box shadow), and add a background image as well (like a star or heart). Background position can move the image and background size is the size. The third set of codes is the color and image when you point to the anime or manga and has a white glow. Add the codes to the bottom of the CSS. Right now, this code marks Code Geass which is anime #1575 (see its URL in the address bar for the Code Geass page on MAL). You can set a glow to a different anime or manga with this code by changing the 1575 number to the number on the new anime or manga's page. If it's a manga, change the word anime to manga. Box shadow code generator for the glow: https://www.cssmatic.com/box-shadow
/*COVER GLOW*/
.link[href^="/anime/1575/"] ~ .add-edit-more .more a {
box-shadow: 1px 1px 15px 10px gold !important;
background-image: url() !important;
display: block !important;
background-color: transparent;
background-size: 20% !important;
background-repeat: no-repeat;
background-position: top center;
content: "";
display: block !important;
color: transparent !important;
opacity: 1 !important;
display: block !important;
pointer-events: none !important;
content: "";
width: 180px !important;
height: 285px !important;
position: absolute;
left: -87px;
top: -34px;
}


.link[href^="/anime/1575/"] ~ .add-edit-more {
opacity: 1 !important;
}

.list-table .list-table-data:hover .link[href^="/anime/1575/"] ~ .add-edit-more .more a {
box-shadow: 1px 1px 15px 10px white !important;
background-image: url() !important;
}


.list-table .list-table-data .data.title .edit a{
opacity: 0;
}

.list-table .list-table-data:hover .data.title .edit a{
opacity: 1;
}
To add a glow to a new anime or manga, add this to the top of the first set of codes: .link[href^="/anime/1575/"] ~ .add-edit-more .more a, and add this to the second: .link[href^="/anime/1575/"] ~ .add-edit-more , and this to the third: .list-table .list-table-data:hover .link[href^="/anime/1575/"] ~ .add-edit-more .more a, So, the codes would look something like this below afterwards. Then change the 1575 number again for a new anime or manga number. Repeat as needed, to add all the glows you want!
/*COVER GLOW*/
.link[href^="/anime/1575/"] ~ .add-edit-more .more a,
.link[href^="/anime/9999/"] ~ .add-edit-more .more a {
box-shadow: 1px 1px 15px 10px gold !important;
background-image: url() !important;
display: block !important;
background-color: transparent;
background-size: 20% !important;
background-repeat: no-repeat;
background-position: top center;
content: "";
display: block !important;
color: transparent !important;
opacity: 1 !important;
display: block !important;
pointer-events: none !important;
content: "";
width: 180px !important;
height: 285px !important;
position: absolute;
left: -87px;
top: -34px;
}

.link[href^="/anime/1575/"] ~ .add-edit-more,
.link[href^="/anime/9999/"] ~ .add-edit-more {
opacity: 1 !important;
}

.list-table .list-table-data:hover .link[href^="/anime/1575/"] ~ .add-edit-more .more a,
.list-table .list-table-data:hover .link[href^="/anime/9999/"] ~ .add-edit-more .more a {
box-shadow: 1px 1px 15px 10px white !important;
background-image: url() !important;
}


.list-table .list-table-data .data.title .edit a{
opacity: 0;
}

.list-table .list-table-data:hover .data.title .edit a{
opacity: 1;
}
Adjust space and size of titles (get big titles!) 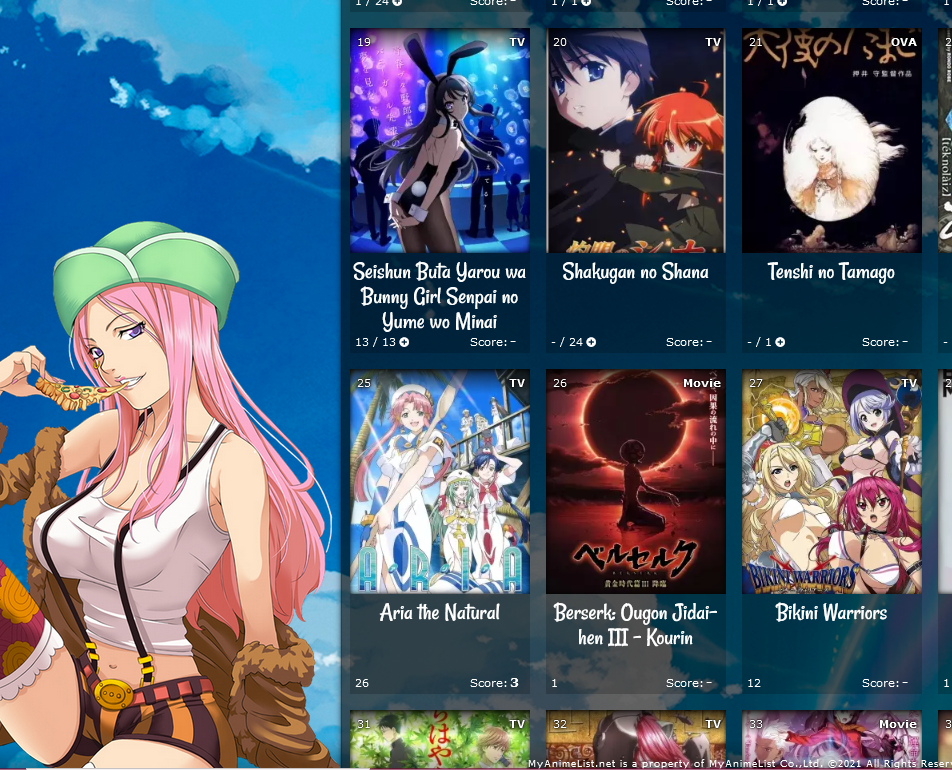 There's several codes you can add to adjust the titles. This lets you control the title font size, color, and type. Adjust the font size as needed.
/*ANIME TITLES*/
.list-table .list-table-data .data.title .link {
 font-size: 24px !important;
text-decoration: none !important;
font-family: Rancho,sans-serif;
font-weight: 100 !important;
transition: all .1s ease 0s;
color: #fff !important;
}
You need to add this if you make your font very large so it can be seen after a certain height. .data.title>a{
overflow: visible;
}You need to add this if you make your font very large so you have more space. Change the height px if needed. If you use the glow and/or dark overlay codes too, their height can be increased to match the new size of the container.
/*ANIME CONTAINER HEIGHT*/
.list-item, .list-item .list-table-data {
height: 325px !important;
}
Finally you can add this if you want to stop transitions when you point to a title.
/*STOP ANIME TITLE TRANSITIONS*/
.list-table .list-table-data:hover .data.title .link{
letter-spacing: inherit !important;
}
Status Text (All Anime/Manga page only) 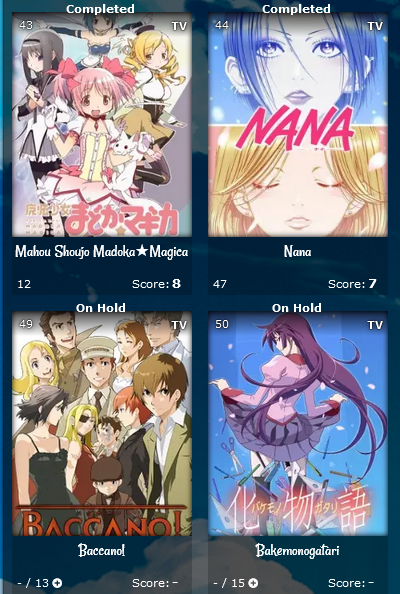 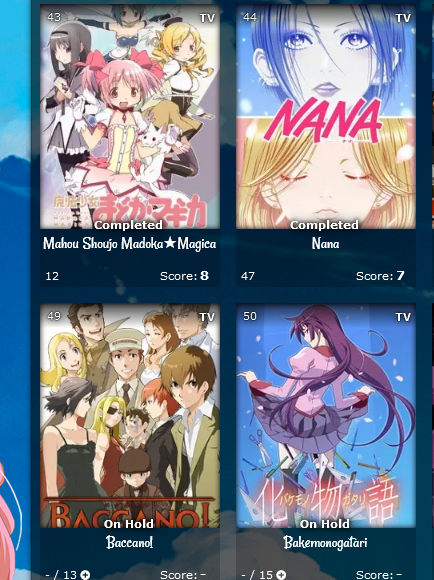 This will identify what the title's status is (Currently Watching, Completed, On-hold, etc) as in the pics above. This first set of codes moves the status to where it is in the first pic. You can move it down with the px amount after margin-top. Add the codes to the bottom of the CSS.
/*STATUS TEXT*/
[data-query*='"status":7'] .data.status.watching:after,
[data-query*='"status":7'].data.status.reading:after,
[data-query*='"status":7'] .data.status.completed:after,
[data-query*='"status":7'] .data.status.onhold:after,
[data-query*='"status":7'] .data.status.dropped:after,
[data-query*='"status":7'] .data.status.plantowatch:after,
[data-query*='"status":7'] .data.status.plantoread:after
{
margin-top: -12px;
font-weight: bold;
position: absolute;
margin-left: -11px !important;
left: 0 !important;
width: 200px;
text-shadow:0 0 5px #000,0 0 5px #000,5px 1px 11px #000,0 0 0 #fff !important;
}

[data-query*='"status":7'] .data.status.watching:after{
content: "Currently Watching";
}
[data-query*='"status":7'] .data.status.reading:after{
	content: "Currently Reading";
}
[data-query*='"status":7'] .data.status.completed:after{
	content: "Completed";
}
[data-query*='"status":7'] .data.status.onhold:after{
	content: "On Hold";
}
[data-query*='"status":7'] .data.status.dropped:after{
	content: "Dropped";
}
[data-query*='"status":7'] .data.status.plantowatch:after{
	content: "Plan to Watch";
}
[data-query*='"status":7'] .data.status.plantoread:after{
	content: "Plan to Read";
}
If you add this, the text will disappear when you point to a title. Add the codes to the bottom of the CSS.
.list-table .list-table-data:hover .data.status.watching:after,
.list-table .list-table-data:hover .data.status.reading:after,
.list-table .list-table-data:hover .data.status.completed:after,
.list-table .list-table-data:hover .data.status.onhold:after,
.list-table .list-table-data:hover .data.status.dropped:after,
.list-table .list-table-data:hover .data.status.plantowatch:after,
.list-table .list-table-data:hover .data.status.plantoread:after{
opacity: 0;
}
Change a preview pic to a different image 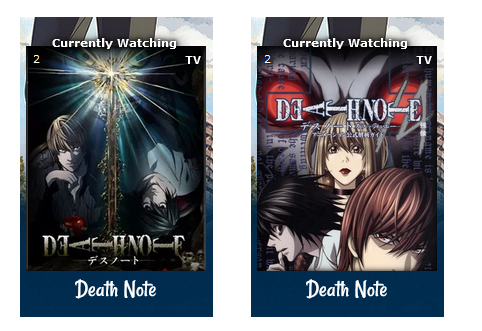 /*PREVIEW PICS/COVERS
If you want to customize a preview pic, use the code below but change the number after "anime" to the anime's number in its URL (the number in the URL on its MAL page). You can point to the title to see the number at the end of its URL too. Change the background image link to the image you want.
Change "anime" to "manga" to customize manga previews. This code
customizes the Code Geass preview (anime #1575) if you change the background image link. Notice on Code Geass's page the number at the end of the address is 1575.
You can copy and paste the code again to
customize more preview pics, just change the number.*/
.data.image a[href^="/anime/1575/"]:before{background-image:url(https://i.imgur.com/QuPoz5o.jpg);
}Add a Music Player 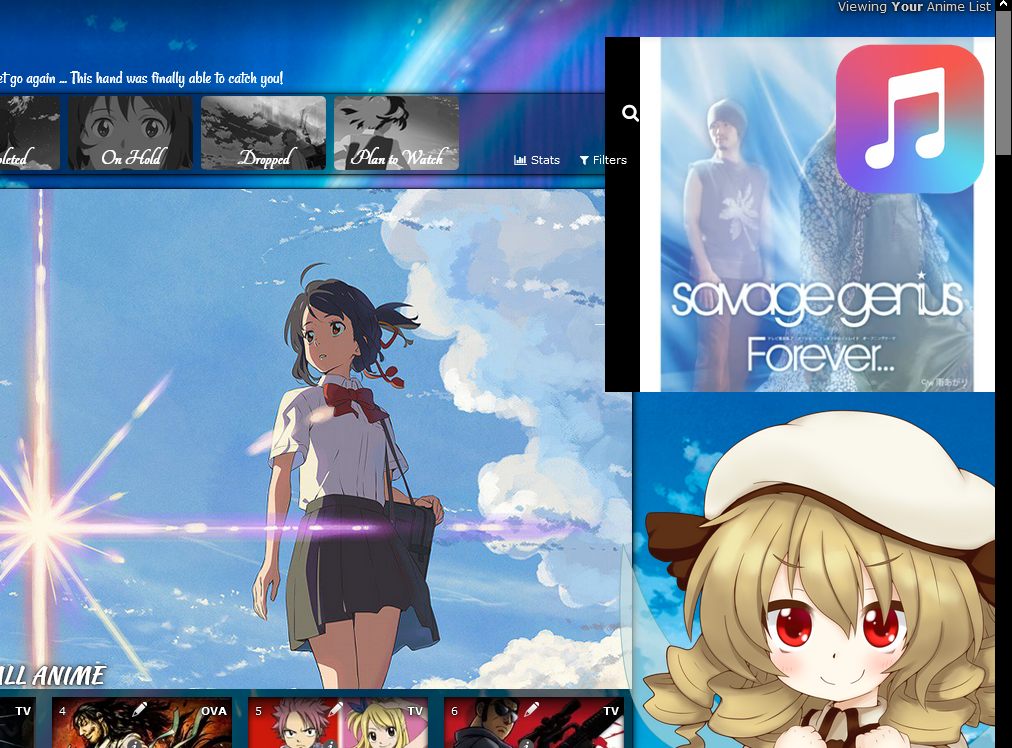 You can play music off Youtube on your list page! First, you need to edit the comments (not the tags, the comments) of one of your anime with Youtube player BBcode like [yt]jWTZimwmwoM[/yt] See my BBcode tutorials for more info on making a Youtube video player. https://myanimelist.net/forum/?topicid=496203 The comments of your anime are accessed by editing it (click the pencil on it) and under Advanced you will see comments. Add the Youtube BBcode to the anime's comments. Then you add this CSS code below to the bottom of your CSS for the music player on your list. You need to change the number 31646 in the first line after anime/ and make it the number for the anime you edited with the Youtube player BBcode. The number for the anime is found on its page at the end of it url, or point to the anime's title and see the number at the end of its URL. If it's a manga, change "anime" to manga too. This code only works for All Anime/Manga pages, but you can change the number after status in the first line to 1 for current, 2 for completed, 3 for on hold, 4 for dropped, and 6 for planned. You can have a music player on each page this way!
/*MUSIC PLAYER*/
[data-query*='"status":7'] .link[href^="/anime/31646/"] ~ .add-edit-more .more a {
display: block !important;
background-color: transparent;
background-size: contain;
background-repeat: no-repeat;
background-position: center center;
background-image: url(https://i.imgur.com/hRBmcfZ.png) !important;
content: "";
display: block !important;
position: fixed !important;
color: transparent !important;
height: 150px !important;
width: 150px !important;
right: 10px !important;
top: 50px !important;;
opacity: 1 !important;
display: block !important;
cursor: pointer !important;
pointer-events: visible !important;
}

[data-query*='"status":7'] .link[href^="/anime/31646/"] ~ .add-edit-more {
opacity: 1 !important;
}

.list-table .list-table-data .data.title .edit a{
opacity: 0;
}

.list-table .list-table-data:hover .data.title .edit a{
opacity: 1;
}

.list-table .more-info{
background-position: center center;
background-repeat: no-repeat;
background-size: contain;
height: 300px !important;
width: 400px !important;
top: 30px !important;
right: 0px !important;
opacity: 1 !important;
position: fixed;
font-size: 0;
z-index: 0;
}
Change list font colors 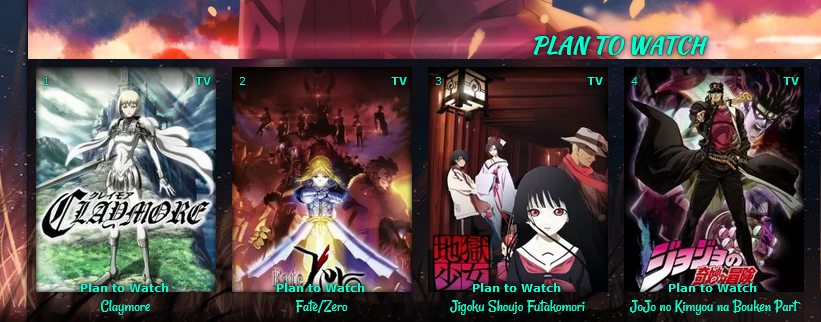 You can already change the table colors with the default code, but now you can change all the text colors with these codes! /* GRID LAYOUT FONT COLORS */
.header *,.header .header-menu .btn-menu,.header .header-menu .header-info,
.header .header-menu *, #header-menu-button,.header .header-menu a,
.list-table .list-table-data .data a,
.list-table .list-table-data .data.title a,
.list-table .list-table-data .data.volume a,
.list-table .list-table-data .data.progress,
.list-table .list-table-data .data.chapter a,
.list-table .list-table-data .data.season,
.list-table .list-table-data .data.studio,
.list-table .list-table-data .data.licensor,
.list-table .list-table-data .data.progress a,
.list-table .list-table-data .data.season a,
.list-table .list-table-data .data.magazine a,
.list-table .list-table-data .data.studio a,
.list-table .list-table-data .data.licensor a,
.list-table .list-table-data .data.volume,
.list-table .list-table-data .data.chapter,
.list-table .list-table-data .data,
.list-table .list-table-data .data.number,
.list-table .list-table-data .data.type,
.list-table .list-table-data .data.progress,
.list-table .list-table-data .data.rated,
.list-table .list-table-data .data.started,
.list-table .list-table-data .data.finished,
.list-table .list-table-data .data.days,
.list-table .list-table-data .data.airing-started,
.list-table .list-table-data .data.airing-finished,
.list-table .list-table-data .data.storage,
.list-table .list-table-data .data.priority,
.list-menu-float span.text,.list-menu-float a,
.cover-block::before,
.list-table .list-table-data .data.tags a,
.list-table .list-table-data .tags .edit,
.list-table .list-table-header::before,
.list-table .list-table-data .data.title .link,
.list-table .list-table-data:hover .data.title .link,
body *, :not(*){
color: red !important
}
/* SIDE MENU ICONS */
.list-menu-float .icon-menu svg.icon,.list-menu-float .icon-menu.profile::before, .list-menu-float::before{
fill: red !important;
color: red !important;
}
/* GRID LAYOUT LINK COLORS ON HOVER */
a:hover,
.list-table .list-table-data .data.title .link:hover,
.list-table .list-table-data .data a:hover,
.list-table .list-table-header:hover:before,
.list-menu-float span.text:hover,.list-menu-float a:hover,
#header-menu-button:hover,
.header .header-menu a:hover,
.list-menu-float .icon-menu.profile:hover:after
{
color: cyan !important;
}Remove transitions on hover This removes all the hover transitions when you point to preview pic except the text appearing. You can selectively remove the codes to restore transitions you want back. You can also combine this with the dark transition above (they are separate). .list-table .list-table-data:hover .data.image a:before{ transform:inherit !important;} .list-table .list-table-data:hover { border: inherit !important;} .list-table .list-table-data:hover { box-shadow: inherit !important;} .list-table .list-table-data:hover .data.title .link{ letter-spacing: inherit !important;} Customize the filter background  Add this code to the bottom of the CSS if you don't see it. This adjusts the filter background. /* FILTER MENU BACKGROUND */ #advanced-options { background-image: url(https://i.imgur.com/06BJudE.jpg) !important;} Resize and move banners/banner text  Add this to the bottom, then adjust the height if you want to adjust the banner height. 500px is just above where the preview pics start and is the default settings for the most recent update of the layout. If you don't have this code in your CSS, you can add it to the bottom and adjust the height from there. You may want to move the covers down afterwards- see the section below. /*BANNER BACKGROUNDS AND HEIGHT
You can change the images here and adjust the height. If you can't see the whole image increase height and/or change "cover" to "contain".
You may want to lower cover pics after (scroll down).*/
/*ALL ANIME/MANGA BANNER BACKGROUND*/
.list-unit.all_anime .list-status-title:after {
background-image: url(http://i.imgur.com/W6iKnWb.png);
background-size: cover !important;
height: 500px !important;
}
/*CURRENTLY WATCHING BANNER BACKGROUND*/
.list-unit.watching .list-status-title:after,
.list-unit.reading .list-status-title:after {
background-image: url(https://i.imgur.com/H0EO4oq.png);
background-size: cover !important;
height: 500px !important;
}
/*COMPLETED BANNER BACKGROUND*/
.list-unit.completed .list-status-title:after {
background-image: url(https://i.imgur.com/49bdCG6.png);
background-size: cover !important;
height: 500px !important;
}
/*ON-HOLD BANNER BACKGROUND*/
.list-unit.onhold .list-status-title:after {
background-image: url(http://i.imgur.com/pPc1BRS.png);
background-size: cover !important;
height: 500px !important;
}
/*DROPPED BANNER BACKGROUND*/
.list-unit.dropped .list-status-title:after {
background-image: url(http://i.imgur.com/XAbWBod.png);
background-size: cover !important;
height: 500px !important;
}
/*PLAN TO BANNER BACKGROUND*/
.list-unit.plantowatch .list-status-title:after,
.list-unit.plantoread .list-status-title:after {
background-image: url(https://i.imgur.com/uDF1ZIt.jpg);
background-size: cover !important;
height: 500px !important;
} This is for the banner text. Add it to the bottom of the CSS and move or resize it with the codes here /*CATEGORY TEXT*/
.list-unit .list-status-title .text{
top: -470px !important;
font-size: 32px !important;
}Move anime/manga preview pics up or down 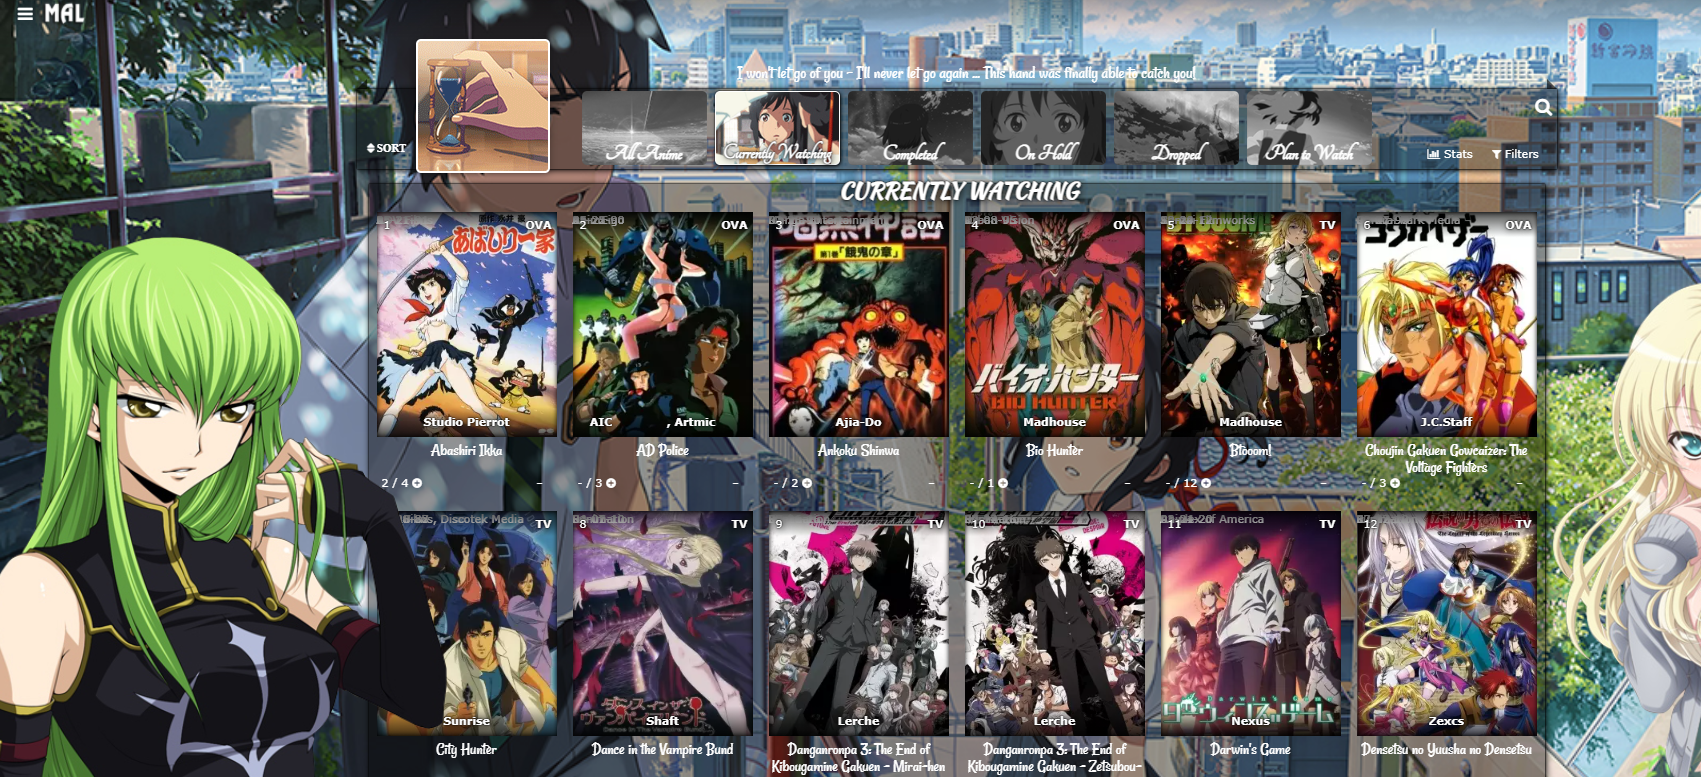 Add this code to the bottom of the CSS. Increase 0px to a higher amount like 100px to move the preview pics all down. To move them up as in the example pic, set the top amount to -480px. /*MOVE COVER PICS UP OR DOWN
Increase 0px to a higher amount like 100px to move the anime preview pics and header (Completed, etc) down. -480px brings them up to the banner buttons.
If you put [data-query*='"status":7'] at the start of the first two lines of code (with a space after), it will affect only All Anime/Manga. Example:
[data-query*='"status":7'] .list-unit .list-status-title .text,
[data-query*='"status":7'] .list-item
Change the 7 to 1 for current, 2 for completed, 3 for hold, 4 for dropped, and 6 for planned. Copy and paste the code again if needed.*/
.list-unit .list-status-title .text,
.list-item{
top: 0px;
}Colors and positioning for the banner quote 
/* BANNER QUOTE AND COLORS

Control the colors here with color for the font, font-size for the font-size, background color for the quote color, and box shadow for the glow color. Width and left may need to be adjusted
depending on the text used.*/
.cover-block::before {

content: "I won't let go of you - I'll never let go again ... This hand was finally able to catch you!";

font-size: 22px !important;
color: white !important;
background-color: #0021FF;
box-shadow: 0px 1px 10px 11px #0021FF;

width: 500px !important;
height: 15px;
top: -40px;
left: 360px;
}
Separate quotes for each category page  Add this code to the bottom and change the quotes. It will override the default quote.
/*BANNER QUOTES*/
[data-query*='"status":7'] .cover-block::before {
	content: "ALL QUOTE"
}

[data-query*='"status":1'] .cover-block::before {
	content: "CURRENT QUOTE"
}

[data-query*='"status":2'] .cover-block::before {
	content: "COMPELTED QUOTE"
}

[data-query*='"status":3'] .cover-block::before {
	content: "HOLD QUOTE"
}

[data-query*='"status":4'] .cover-block::before {
	content: "DROPPED QUOTE"
}

[data-query*='"status":6'] .cover-block::before {
	content: "PLANNED QUOTE"
}
Change category button text and text position   /*CUSTOMIZE BANNER BUTTONS TEXT*/
.status-menu-container .status-menu .status-button.all_anime,
.status-menu-container .status-menu .status-button.watching,
.status-menu-container .status-menu .status-button.reading,
.status-menu-container .status-menu .status-button.completed,
.status-menu-container .status-menu .status-button.onhold,
.status-menu-container .status-menu .status-button.dropped,
.status-menu-container .status-menu .status-button.plantowatch,
.status-menu-container .status-menu .status-button.plantoread{
font-size: 0;
}
.status-menu-container .status-menu .status-button.all_anime:before,
.status-menu-container .status-menu .status-button.watching:before,
.status-menu-container .status-menu .status-button.reading:before,
.status-menu-container .status-menu .status-button.completed:before,
.status-menu-container .status-menu .status-button.onhold:before,
.status-menu-container .status-menu .status-button.dropped:before,
.status-menu-container .status-menu .status-button.plantowatch:before,
.status-menu-container .status-menu .status-button.plantoread:before
{
top: -45px;
position: relative;
width: 150px;}
.status-menu-container .status-menu .status-button.all_anime:before{
content: "text";
font-size: 40px;}
.status-menu-container .status-menu .status-button.watching:before{
content: "text";
font-size: 40px;}
.status-menu-container .status-menu .status-button.reading:before{
content: "text";
font-size: 40px;}
.status-menu-container .status-menu .status-button.completed:before{
content: "text";
font-size: 40px;}
.status-menu-container .status-menu .status-button.onhold:before{
content: "text";
font-size: 40px;}
.status-menu-container .status-menu .status-button.dropped:before{
content: "text";
font-size: 40px;}
.status-menu-container .status-menu .status-button.plantowatch:before{
content: "text";
font-size: 40px;}
.status-menu-container .status-menu .status-button.plantoread:before{
content: "text";
font-size: 40px;}Add text to the edit and add buttons 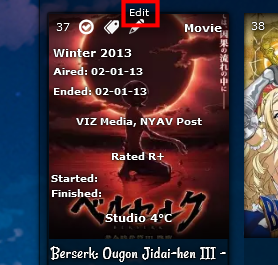 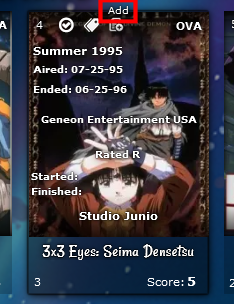 /*EDIT ADD TEXT*/ .list-table .list-table-data .data.title .edit:hover a:before{ content: "Edit"; color: white; font-size: 10px; position: absolute; top: 0px; width: 100px; left: -15px; } .list-table .list-table-data .data.title .add:hover a:before{ content: "Add"; color: white; font-size: 10px; position: absolute; top: -10px; width: 100px; left: -35px; } Full screen grid 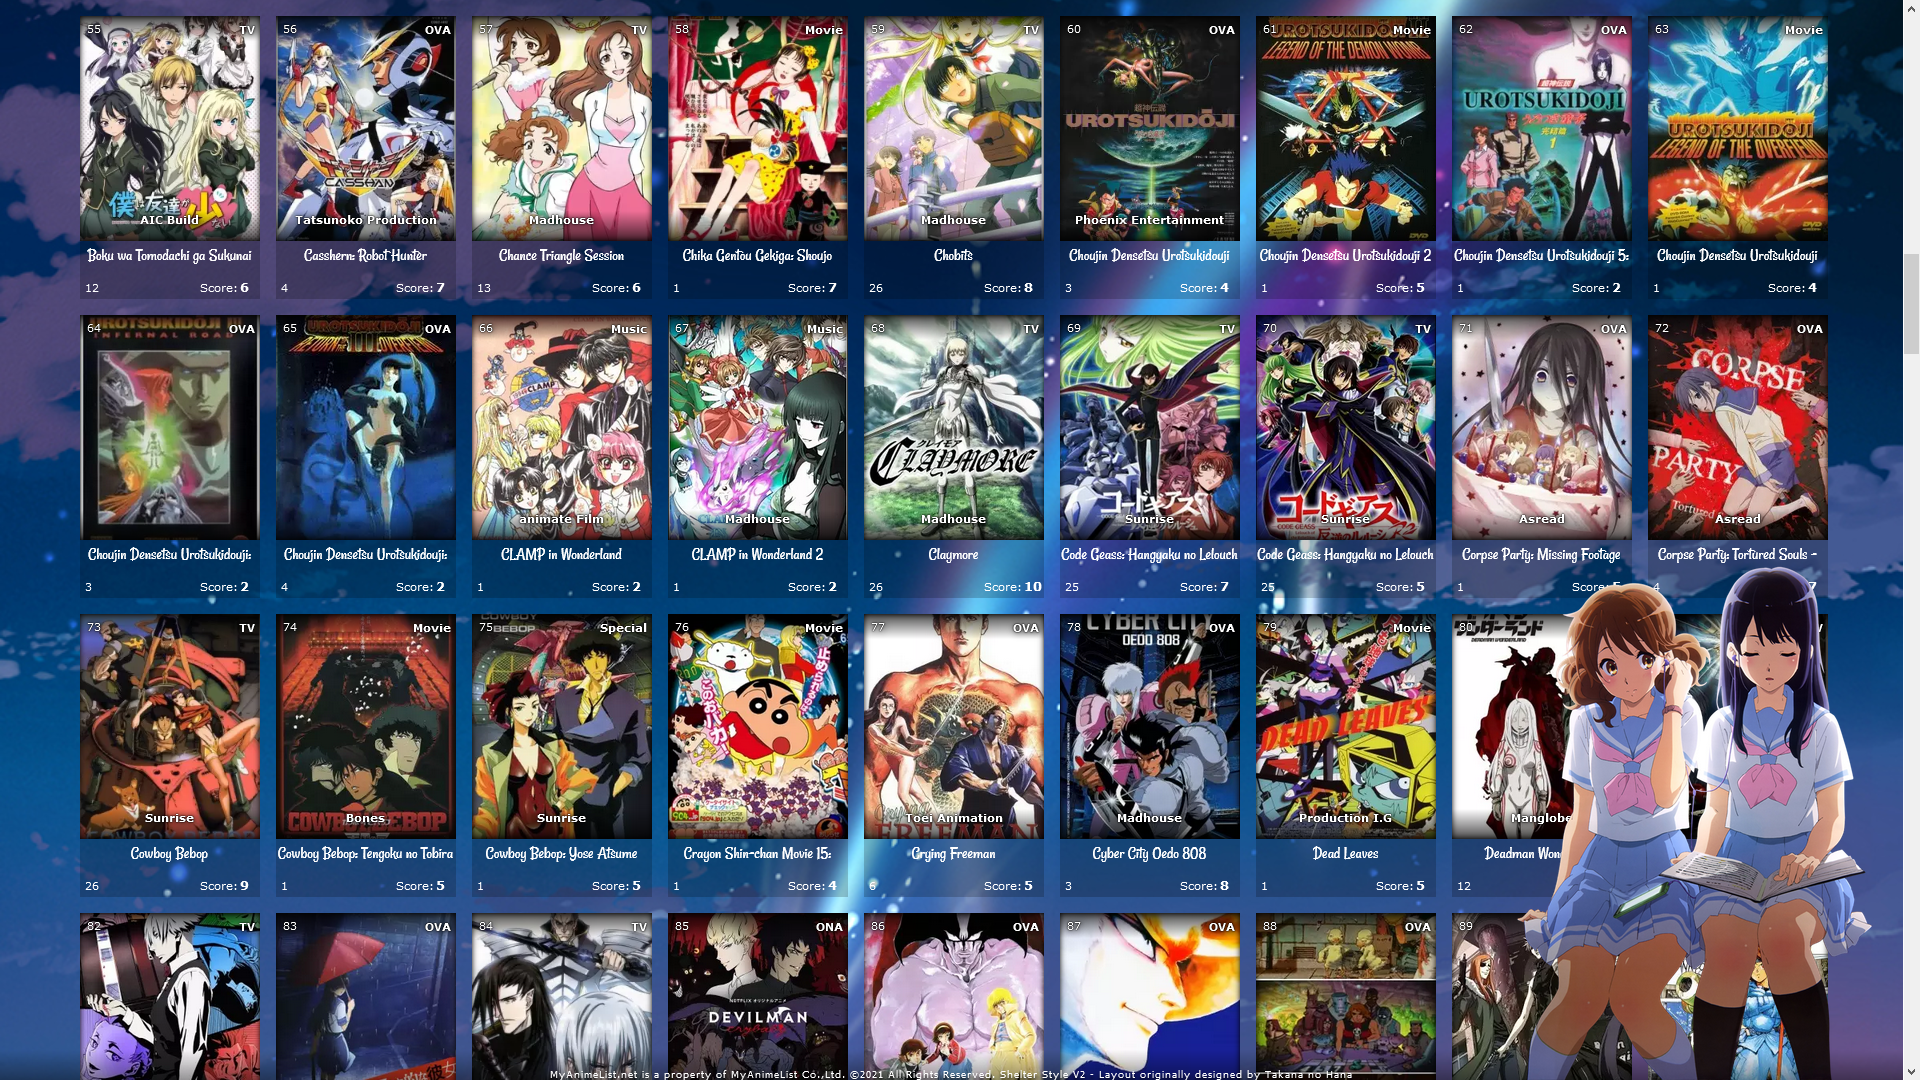 /*FULL SCREEN GRID*/
@media only screen and (min-width: 1500px) {
.list-table {
width: 1830px;
margin: auto;
position: absolute;
left: -280px;
}
body{
overflow-x: hidden !important;
}
.list-table .list-table-header:after {
left: 10px !important;
}
.list-table .list-table-header::before{
position: absolute;
}
.list-table .list-table-header{
left: 290px !important;
position: absolute;
}
}Fixed Header Menu and Categories 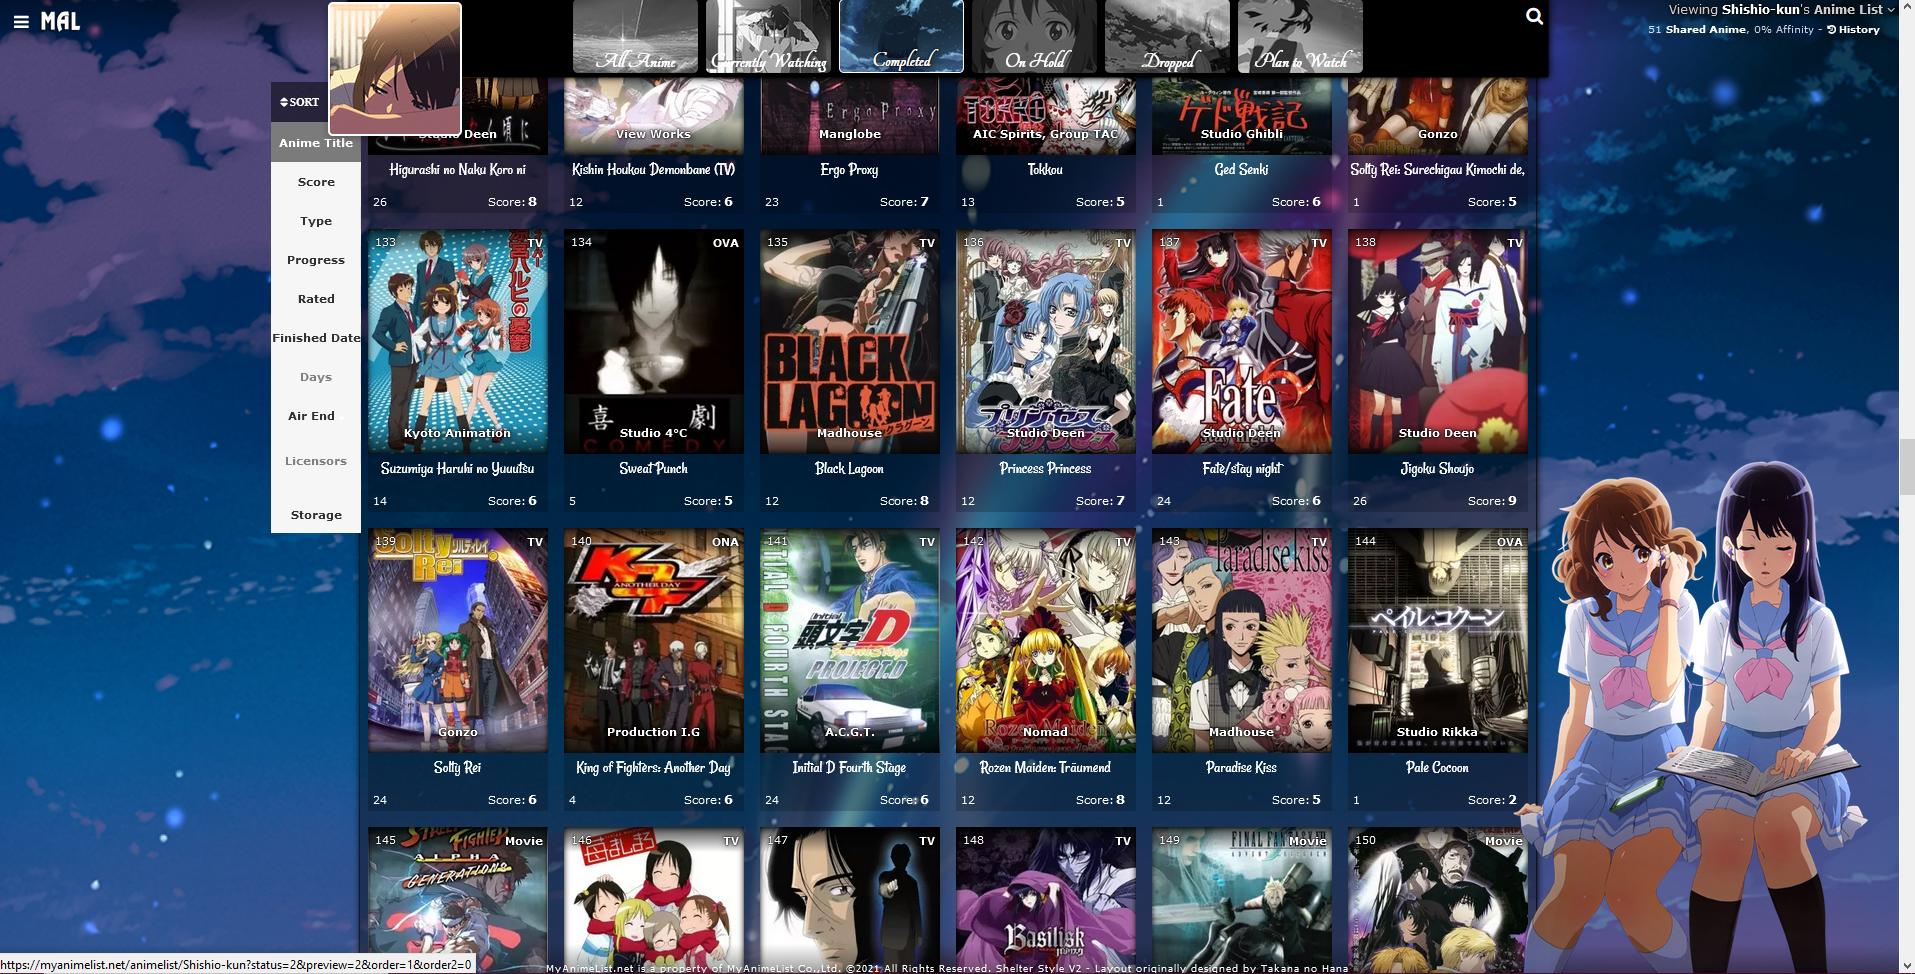 /*FIXED HEADER*/
.header{
position: fixed;
}
.list-menu-float {
position: fixed;
}
.status-menu-container {
position: fixed !important;
top: 0;
z-index: 10002 !important;
}
.status-menu-container.fixed {
position: fixed !important;
display: block !important;
background-color: black !important;
z-index: 10002 !important;
}
.list-table .list-table-header:after {
top: 160px;
z-index: 10003 !important;
}
.list-table .list-table-header::before{
position: fixed;
z-index: 10003 !important;
}
.list-table .list-table-header{
z-index: 10003 !important;
left: 15%;
top: 640px;
position: fixed;
}
.cover-block::before {
top: 0px;
position: relative;
}
Add rising or falling particle animation 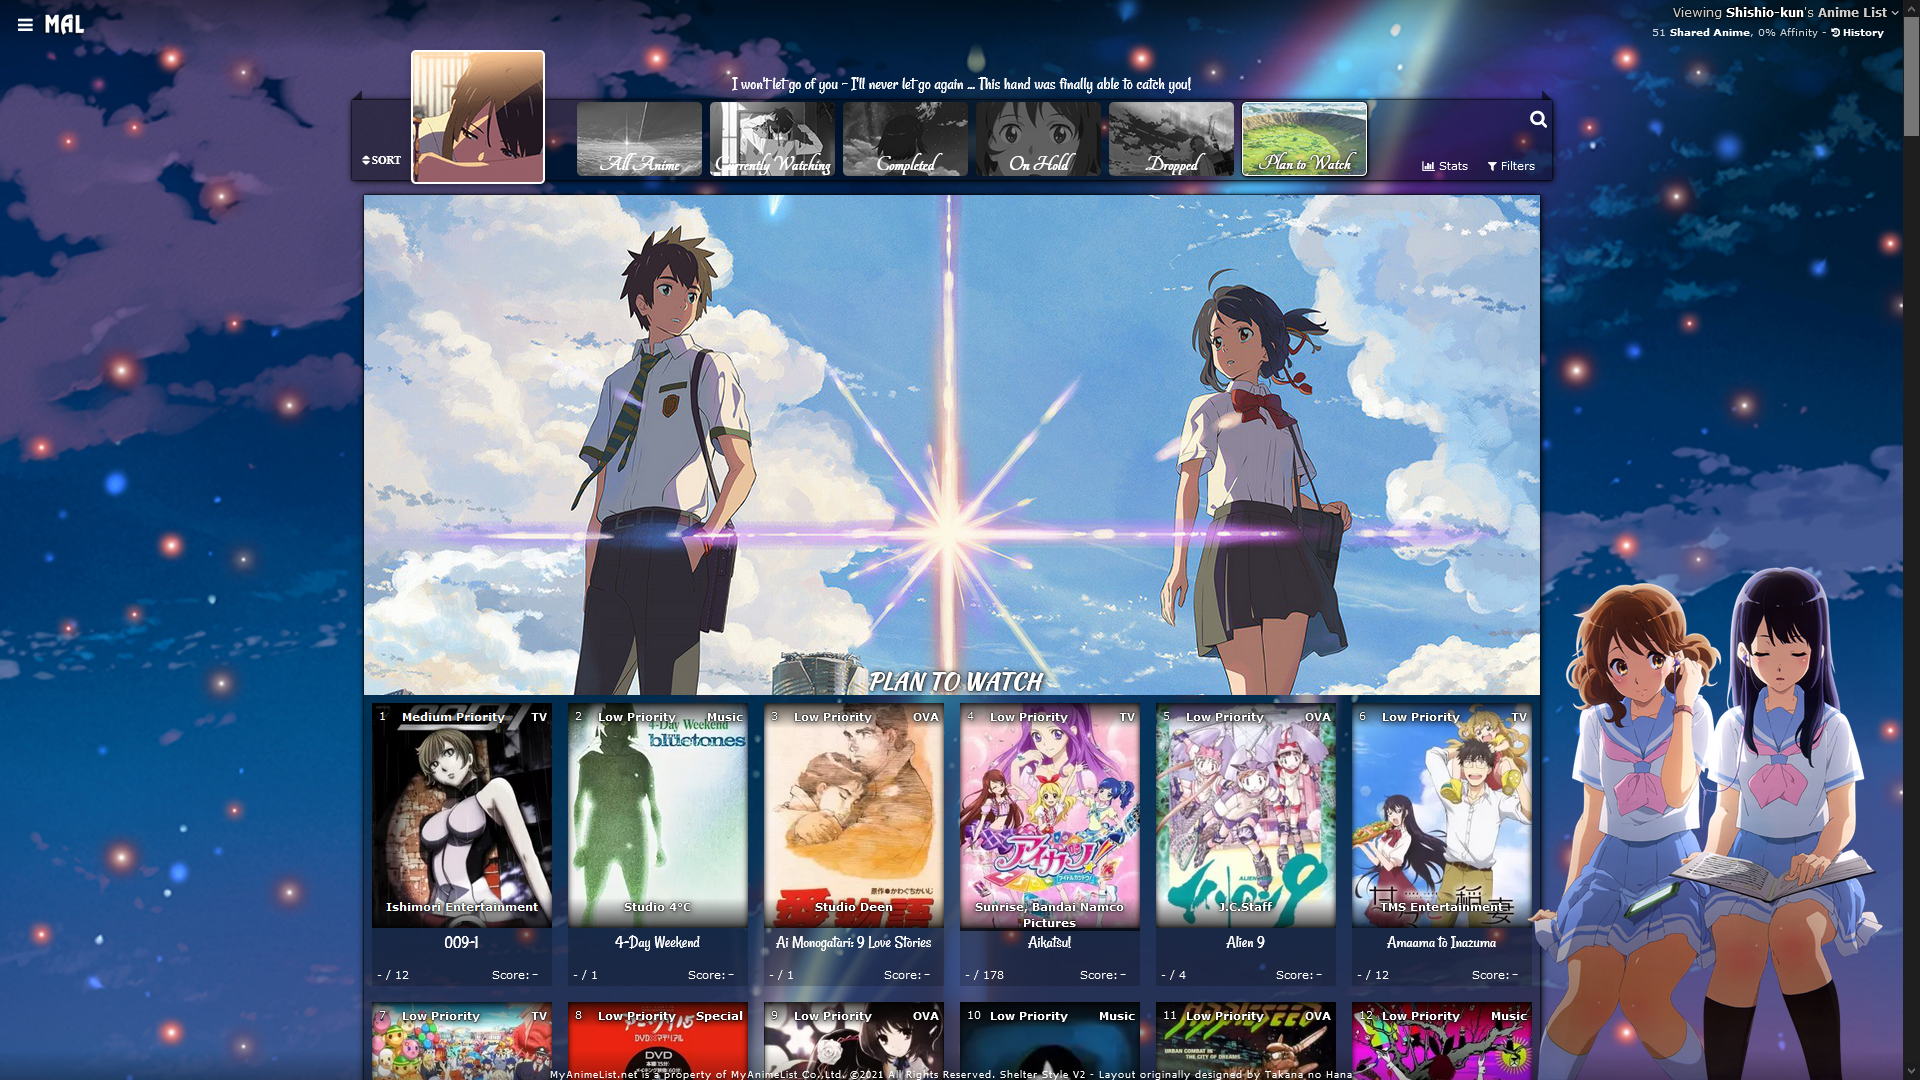 Many options! See the separate topic. https://myanimelist.net/forum/?topicid=1911907 Add falling cherry blossoms animation 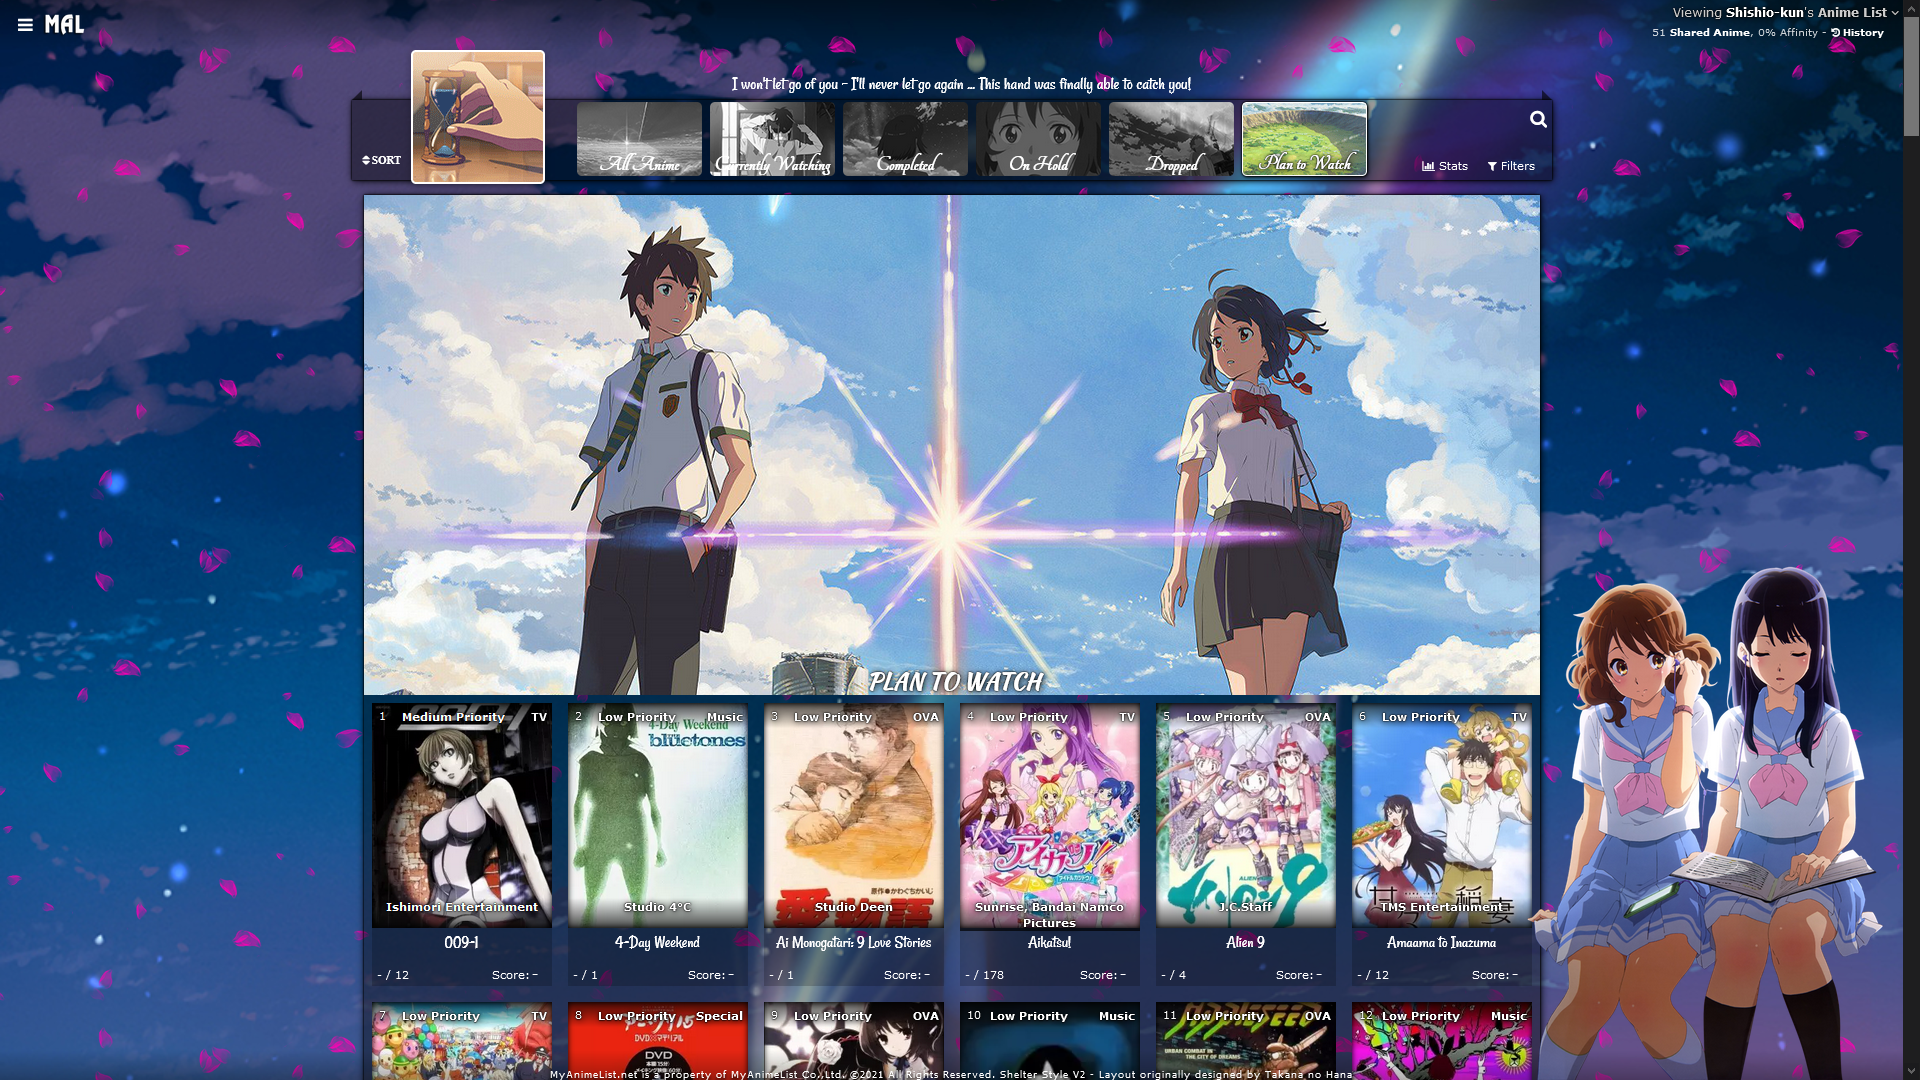 Many options! See the separate topic. https://myanimelist.net/forum/?topicid=1911984 Add falling snow animation  Many options! See the separate topic. https://myanimelist.net/forum/?topicid=1911957 Animated Scrollbar  This is the default scrollbar code for this layout. You can make a new scrollbar if you want and replace the image!
.list-container {
    margin-top: 300px;
}

/* ANIMATED SCROLLBAR  */

.list-unit:before {
opacity: 1 !important;
pointer-events: none !important;
position: absolute !important;
content: '';
width: 200% !important;
height: 200px;
top: -300px !important;
left: -400px !important;
display: block !important;
background-image: url(https://i.imgur.com/sBP3H2S.png) !important;
animation: scroll 100s linear infinite;
z-index: -10000 !important;
}


@keyframes scroll
{
0% { background-position: 0; }
100% { background-position: 200%; }
}

@keyframes intro{from{opacity:0;margin-top:100vh}16%{opacity:0;margin-top:100vh}to{opacity:1;margin-top:300px}}
Animated scrollbar also has its own topic: https://myanimelist.net/forum/?topicid=1912057 Custom render reads your tags 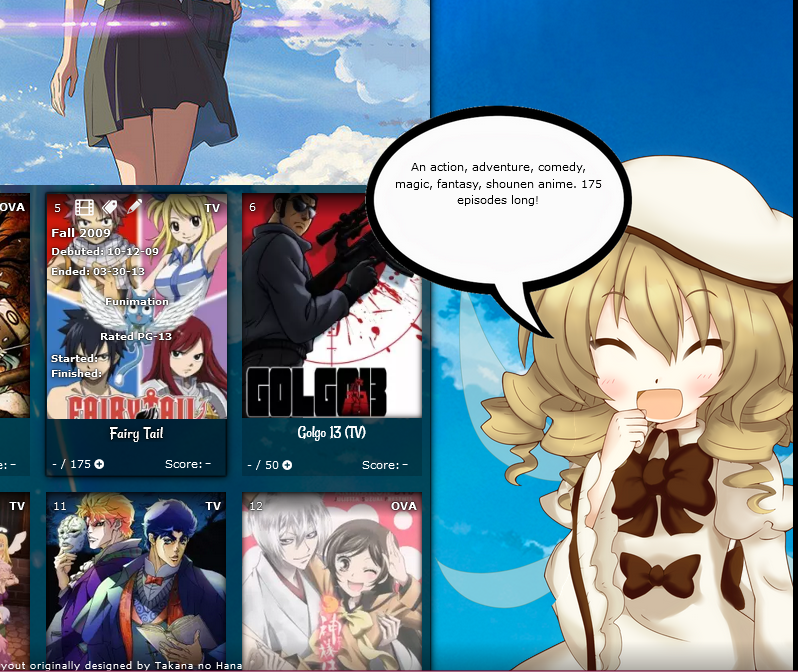 https://myanimelist.net/forum/?topicid=1922650 List of all changes and updates in the new layouts * You can use all list columns now (storage, days, start/finish, licensor, etc). * The cursor won't appear as loading anymore. * Custom cursors will be more consistent across different layouts and browsers. * It's easier to change the cursor now. * User avatar fills up no matter what size the pic is and you can adjust it. * The banner background won't show up behind the preview pics anymore, it stops by default at the preview pics. * Much of the CSS is compressed to allow more extensions and additional codes on the bottom. It should be easier to scroll through. * Editing score is black and white on click and non-click now to make it very clear. * Editing scores and adding episodes has more room to make it easier to click. * If you point to a title you see the entire title (thanks Valerio_Lyndon for this). * Table colors should be easier to change with links to a RGBA generator. * Much of the CSS is compressed to make it much shorter to scroll through. * You can change the Filter background with the default codes. * You can move the preview pics in the default code. * Tags are clickable in the default codes. * Editing tags is smoother. * Colors consistent on dark themes. * Fonts and colors more consistent. * Categories appended to make them clearer. * Sort menu pointer events fixed (thanks Valerio_Lyndon). * Render codes are more consistent. * The top is more informative with links to help. * The cover imports make the layout load faster than the default with your username. * Profile in side menu is more consistent with menu and can be changed. * More customization overall for text on the layout. * New Feature: Import lets me send updates and fixes for preview pics to your layout. * New Feature: The category button text can be changed or moved up. * New Feature: You can also adjust the banner height, width, and position if you want. * New Feature: You can also adjust the preview pics position. * New Feature: The avatar can be shifted left or right. * New Feature: If you use the Days column, you can add "Days" after the days number to make it clear to you and viewers what that number means. * New Feature: You can add help text with the Edit and Add icons. Also very useful for viewers. * New Feature: You can add dark lighting on hover for the preview pics to make the text easier to read. * New Feature: You can remove the transition effects when you point to a preview pic. * New Feature: You can expand the grid and customize it. * New Feature: You can fix the menus to the screen so they are there when you scroll down. * New Feature: The logo can be changed with the new default codes. * New Feature: The table and font colors are easier to change, including all font at once. * New Feature: Many animations can be added. * New Feature: Imported versions allow more customization than what was possible before. * New Feature: Music players can be added. * New Feature: Side render can read tags. * New Feature: Title text can bigger. * New Feature: Glow around select anime and manga. * New Feature: Status Text * New Feature: Quote for each page * New Feature: Full list font color customization. * New Feature: More quote customization. |
Shishio-kunMay 23, 2022 7:48 AM
Reply Disabled for Non-Club Members
May 28, 2021 5:24 AM
#2
| Thanks for the great work, keep it up. |
May 10, 2022 11:33 AM
#3
| I got it mostly working on my profile, but the text fails to render. What should I do? (The speech bubble only had the image and pos changed, but the unedited CSS did not render the text either) |
May 10, 2022 11:52 AM
#4
Alemismun said: I got it mostly working on my profile, but the text fails to render. What should I do? (The speech bubble only had the image and pos changed, but the unedited CSS did not render the text either) You don't have any tags written on your list. That's the text you see when you point to a row. You have to point to it on your lists and Edit Tags to add some text. Looks like you also turned tags off at one point while I was looking at your list, you need tags on. And you're not using this layout, for default use the codes on this page https://myanimelist.net/forum/?topicid=1923148 You want to use the second set of codes but you can use the same character for both if you want |
Shishio-kunMay 10, 2022 11:57 AM
May 10, 2022 1:17 PM
#5
Shishio-kun said: Alemismun said: I got it mostly working on my profile, but the text fails to render. What should I do? (The speech bubble only had the image and pos changed, but the unedited CSS did not render the text either) You don't have any tags written on your list. That's the text you see when you point to a row. You have to point to it on your lists and Edit Tags to add some text. Looks like you also turned tags off at one point while I was looking at your list, you need tags on. And you're not using this layout, for default use the codes on this page https://myanimelist.net/forum/?topicid=1923148 You want to use the second set of codes but you can use the same character for both if you want Thank you!! I've enabled tags (and used the code you pointed to). Is it possible to switch the tags for a Genre list? PS. Is there also a way to move the position of the text? Thanks a lot for the answer! |
AlemismunMay 10, 2022 1:27 PM
May 10, 2022 1:38 PM
#6
Alemismun said: Shishio-kun said: Alemismun said: I got it mostly working on my profile, but the text fails to render. What should I do? (The speech bubble only had the image and pos changed, but the unedited CSS did not render the text either) You don't have any tags written on your list. That's the text you see when you point to a row. You have to point to it on your lists and Edit Tags to add some text. Looks like you also turned tags off at one point while I was looking at your list, you need tags on. And you're not using this layout, for default use the codes on this page https://myanimelist.net/forum/?topicid=1923148 You want to use the second set of codes but you can use the same character for both if you want Thank you!! I've enabled tags (and used the code you pointed to). Is it possible to switch the tags for a Genre list? PS. Is there also a way to move the position of the text? Thanks a lot for the answer! Probably yes, if you switch the selector codes used for tags with the genre code, find it with inspect element right click in firefox, there's a video for it in this group (inspect element) To move it find all the right and top and margin codes, you have to edit the numbers after those to move the stuff around |
May 10, 2022 2:07 PM
#7
| And you could probably just switch the instances of "tags" with "genre" in the code, can't tell you for sure as you don't have genres on your list |
May 23, 2022 11:42 AM
#8
| how do i get rid of the avatar on the left of the header? |
May 23, 2022 11:51 AM
#9
ParaNoClue said: how do i get rid of the avatar on the left of the header? Based on the opening post, I'm guessing this and it goes at the bottom: .list-table .list-table-header:after, .cover-block::after { display: none !important; } |
Reply Disabled for Non-Club Members
More topics from this board
Sticky: » [ SIGNATURES ~ PROFILES] All guides, generators, and templatesShishio-kun - Feb 16, 2023 |
32 |
by dextr__
»»
Today, 7:37 AM |
|
» ❓ Ask for help here + See Frequently Asked Questions ( 1 2 3 4 5 ... Last Page )Shishio-kun - Apr 15, 2010 |
7924 |
by Shishio-kun
»»
Sep 24, 1:50 AM |
|
» [CSS - Modern] 🍰 Clarity by V.L ( 1 2 3 4 5 ... Last Page )Valerio_Lyndon - Apr 19, 2018 |
1262 |
by Shishio-kun
»»
Sep 22, 4:35 AM |
|
» [CSS - MODERN] ⚡️ Fully-Customizable Layouts (2024 updates!) ( 1 2 3 4 5 ... Last Page )Shishio-kun - Jul 21, 2017 |
382 |
by Shishio-kun
»»
Sep 22, 4:29 AM |
|
Sticky: » [ BBCODE ] All 2023 BBcodes, Guides, and Templates ( 1 2 )Shishio-kun - Feb 16, 2023 |
57 |
by Shishio-kun
»»
Sep 22, 4:27 AM |