New
Dec 14, 2008 2:27 PM
#1

HOW TO CREATE A SIGNATURE ::PHOTOSHOP TUTORIAL BY SunyiNyufi:: --------------------------------------------------------------------------------------------- Step 1. - Finding a picture So first of all you need to find a picture you want to use for your sig. I mostly use high resolution pictures, 'cos they aren't blurry, so it's easy to work with them. An other important thing is to look for a pic with possibily solid background, 'cos it's easier to make a render from... but about that later. Anyway, the pic should be bigger then the sig. Here are some sites, where you can find good pictures: If you never made a render before, but you would want to use one, I advise to look for one at Planet Renders or Anime render Step 2. - Make a render So I decided to use this picture for a sig that I make for a friend. But I only want to use the guy on the left, so in Photoshop I make a selection with the rectangular marque tool <img src="http://i112.photobucket.com/albums/n174/Zurui_Usagi/tutorial/01.png" border="0" /> and select the part of him I want to use for the sig. naturally it will be his face mostly. <img src="http://i112.photobucket.com/albums/n174/Zurui_Usagi/tutorial/02.png" border="0" /> I copy the selected part with Ctrl+C. Then I open a new document <img src="http://i112.photobucket.com/albums/n174/Zurui_Usagi/tutorial/03.png" border="0" /> And paste the pic in it. (You can close the original picture.) Now I want to separate the guy from the background, so I can make a nice custom background myself. First I will use the Magic Wand Tool <img src="http://i112.photobucket.com/albums/n174/Zurui_Usagi/tutorial/04.png" border="0" /> I can use it, because the background is mostly gray. So I click on the gray part to select it <img src="http://i112.photobucket.com/albums/n174/Zurui_Usagi/tutorial/05.png" border="0" /> And then cut it out with Ctrl+X <img src="http://i112.photobucket.com/albums/n174/Zurui_Usagi/tutorial/06.png" border="0" /> But as you can see, not all grey parts were cut out. They are some areas which have the background color, but you might not notice it first. So it good to make a new layer <img src="http://i112.photobucket.com/albums/n174/Zurui_Usagi/tutorial/07.png" border="0" /> move the layer under the layer with the character, and fill it with some dark color. Now we can see clearly where we have to cut parts out. <img src="http://i112.photobucket.com/albums/n174/Zurui_Usagi/tutorial/08.png" border="0" /> Oh and btw, you can select more then one area with the magic wand, if you hold down the Shift key. So I did cut out the rest, but there are still tiny bits of grey which we must get rid of, to make our render look cool. <img src="http://i112.photobucket.com/albums/n174/Zurui_Usagi/tutorial/09.png" border="0" /> We can cut these out while zooming in <img src="http://i112.photobucket.com/albums/n174/Zurui_Usagi/tutorial/10.png" border="0" /> Now we are almost ready with the render, we only have to get rid of the other guy's arm. (Actually we could use the pic already as it is, but if we do that I won't be able to show how to make render in a different way :P) Zooming in again, and this time we will use the Freeform Pen Tool <img src="http://i112.photobucket.com/albums/n174/Zurui_Usagi/tutorial/11.png" border="0" /> With the Freeform Pen Tool we carefully trace along the arm of our character, to get something like this: <img src="http://i112.photobucket.com/albums/n174/Zurui_Usagi/tutorial/12-1.jpg" border="0" /> After that you go around the other guy's arm too, including the edges of the picture. Now make a right click, and choose "Make Selection" <img src="http://i112.photobucket.com/albums/n174/Zurui_Usagi/tutorial/13.png" border="0" /> <img src="http://i112.photobucket.com/albums/n174/Zurui_Usagi/tutorial/14.png" border="0" /><img src="http://i112.photobucket.com/albums/n174/Zurui_Usagi/tutorial/15.png" border="0" /> Cut out selection, and we have a completely clean render now. If you think your render is not perfectly clean, you can trace along the edges with the eraser tool, I do that most of the time. I have to say that making a render is most of the time not as easy as this one was. You have to practice with the pen tool quite a lot till you get the hang of it, but I think it's worth the time. Step 3. - Making background First I have to make sure which part of the render I want to use. Since the sig's height can be max 140 pixel, I select the face, neck and part of the hair. There's no need to have his whole head in the sig. <img src="http://i112.photobucket.com/albums/n174/Zurui_Usagi/tutorial/16.png" border="0" /> I copy the selected part and make a new document, and paste (just like before) <img src="http://i112.photobucket.com/albums/n174/Zurui_Usagi/tutorial/17.png" border="0" /> Now I go to the Image menu, and click on Image size, cause we have to resize the pic to fit in the sig, so I set the height to 140 px. <img src="http://i112.photobucket.com/albums/n174/Zurui_Usagi/tutorial/18.png" border="0" /> <img src="http://i112.photobucket.com/albums/n174/Zurui_Usagi/tutorial/19.png" border="0" /> Now, since I'm too lazy to make a new document for the signature itself, I go to Image menu again, and click on Canvas size this time. Here we can resize or work area. Since the max size is 600*140, I set the width to 600 px. <img src="http://i112.photobucket.com/albums/n174/Zurui_Usagi/tutorial/20.png" border="0" /> Now we have something like this: <img src="http://i112.photobucket.com/albums/n174/Zurui_Usagi/tutorial/21.png" border="0" /> Since the guy is facing left I move him to the right side of the sig, and the updates will be on the left side. Then I make a new layer, and put it under the layer with the guy on it, this will be our first layer to make a background on. <img src="http://i112.photobucket.com/albums/n174/Zurui_Usagi/tutorial/22.png" border="0" /> Now fill the Background 1 layer with the color of your choice (Select color, then go Edit>Fill and fill with foreground color). I want the sig to be blue, so I fill it with #16426d <img src="http://i112.photobucket.com/albums/n174/Zurui_Usagi/tutorial/23.png" border="0" /> But plain bakcground is boring, so we will use textures, but not the once included in Photoshop, cos they are lame. Everyone can find nice textures at Deviantart. Why to use textures? Because they are easier to use then brushes, and look cool. I most of the time use at least one or two texture layers for the background. I decided to use a music sheet texture first (cos the guy is listening to music). So I open the music sheet pic in Photoshop, and resize it. I mostly resize texture to 600 px width, but this time I will use a width of 750 px, 'cos the sides of the sheet are compeletly black, and I don't neet that black. So after resizing it, I select the whole pic, and copy it. <img src="http://i112.photobucket.com/albums/n174/Zurui_Usagi/tutorial/24.png" border="0" /> Then I go back to the sig and paste it beyond Background 1. <img src="http://i112.photobucket.com/albums/n174/Zurui_Usagi/tutorial/25.png" border="0" /> <img src="http://i112.photobucket.com/albums/n174/Zurui_Usagi/tutorial/26.png" border="0" /> But as I said, I want the sig to be blue, so I play around with the blending option. <img src="http://i112.photobucket.com/albums/n174/Zurui_Usagi/tutorial/27.png" border="0" /> If you want to know more about the blending options click here. I most of the time try all of them out to see which one I like the best. This time I will use Color Dodge, which will make the sig look like this: <img src="http://i112.photobucket.com/albums/n174/Zurui_Usagi/tutorial/28.png" border="0" /> Nice huh? But we are not ready yet. I want to add another texture too, this (resized preview). So I open it in Photoshop, and just like before, resize it, copy it, paste it (this time beyond Background 2), and change belending mode... This time I use Overlay: <img src="http://i112.photobucket.com/albums/n174/Zurui_Usagi/tutorial/29.png" border="0" /> I'm not ready with this layer (Background 3) yet. I want the music notes to be more visible, so I lower Background 3's opacity to 70% <img src="http://i112.photobucket.com/albums/n174/Zurui_Usagi/tutorial/30.png" border="0" /> But now the pattern on Background 3 are a bit too light for my taste, so I go to Image>Adjustment>Brightness/Contrast, and ad more contrast to it. <img src="http://i112.photobucket.com/albums/n174/Zurui_Usagi/tutorial/32.png" border="0" /> Now we have a pretty nice background, but I want it to be even nicer, so I will use a couple of brushes to put stains on the music sheet. For that I make a new layer, select white as foreground color, and click on the brush tool. Then I use several of my stain brushes (you can find brushes at deviantart). In the end it will look like this: <img src="http://i112.photobucket.com/albums/n174/Zurui_Usagi/tutorial/33.png" border="0" /> Of course I don't want it to be white, so I set the layer with the brushes to Soft Light. <img src="http://i112.photobucket.com/albums/n174/Zurui_Usagi/tutorial/34.png" border="0" /> Now I go to the guys layer, right click and select Belending Options. I want to add a nice glow to him, so I go to Outer Glow. I set the color to one of the darker colors from the background, and make the size of the glow a bit bigger, and also make it spread a bit more, and lower the opacity of the glow, and make sure it's set to Screen. <img src="http://i112.photobucket.com/albums/n174/Zurui_Usagi/tutorial/35.png" border="0" /> <img src="http://i112.photobucket.com/albums/n174/Zurui_Usagi/tutorial/36.png" border="0" /> Looks nice right? ^^ Step 4. - Adding MAL part Now we will add the MAL part of the sig. For that we will need to decide how many upadtes we want to show. I mostly show 2 rows, 'cos I have a plain MAL-sig-with-2-rows pic on my hard drive (mostly 'cos always forget the its size). I open this pic in Photoshop <img src="http://i112.photobucket.com/albums/n174/Zurui_Usagi/tutorial/SunyiNyufi.png" border="0" /> (How to get it? Open MAL in your browser, click edit on My Profile, go to My Signature, set the rows to your choice, the bakcground to white and font clor to something dark. Click update. Now you can see the updated sig, right click on it and save pic on your PC.) Select the whole pic, and copy it on my sig, and place it, where I want to have the updates. <img src="http://i112.photobucket.com/albums/n174/Zurui_Usagi/tutorial/37.png" border="0" /> <img src="http://i112.photobucket.com/albums/n174/Zurui_Usagi/tutorial/38.png" border="0" /> For the updates I decided to make a border around them, to separate it from the background. So first I select the MAL part with Ctrl+click-on-MAL-layer-little-pic. After that I make a new layer over it. Easiest way to make a border: First choose the color for the border. (Chose a darker color from the background.) Then go to Edit>Stroke - Here you can set the width of the border and the location. I advise everyone to place it outside, this way the border won't overlap with the updates. Since I want to make the border stained too, I set it to be 8 px, but normally it is too much, and I mostly use only 2-3 pixels. <img src="http://i112.photobucket.com/albums/n174/Zurui_Usagi/tutorial/39.png" border="0" /> <img src="http://i112.photobucket.com/albums/n174/Zurui_Usagi/tutorial/40.png" border="0" /> Now I change the blending option of the border's layer to Color Dodge. But it's too bright, so I lower the opacity again (67%) <img src="http://i112.photobucket.com/albums/n174/Zurui_Usagi/tutorial/42.png" border="0" /> After this I zoom in, and with several erasers I delete tiny bits of the border. <img src="http://i112.photobucket.com/albums/n174/Zurui_Usagi/tutorial/41.png" border="0" /> <img src="http://i112.photobucket.com/albums/n174/Zurui_Usagi/tutorial/43.png" border="0" /> The border is ready, but with the music notes and all in the background the updates would be really hard to read. So once again I select the MAL part just as before, make a new layer, and fill the selection (Edit>Fill) with the same color that I used for the border. <img src="http://i112.photobucket.com/albums/n174/Zurui_Usagi/tutorial/44.png" border="0" /> Make sure, that the layer order is like this: <img src="http://i112.photobucket.com/albums/n174/Zurui_Usagi/tutorial/45.png" border="0" /> Now I change the blending of the MAL updates layer to Color Dodge, and lower the opacity. It should be lower than the borders. In my case it's 45% <img src="http://i112.photobucket.com/albums/n174/Zurui_Usagi/tutorial/46.png" border="0" /> And with that, we have our MAL part in it :) Step 5. - Adding text Next we add the update text for the sig. You can add text to your sig with the text tool. <img src="http://i112.photobucket.com/albums/n174/Zurui_Usagi/tutorial/48.png" border="0" /> First is to choose a font. You can find nice fonts at Dafont. I use "You are Loved", 'cos it's one of my favorites :P <img src="http://i112.photobucket.com/albums/n174/Zurui_Usagi/tutorial/47.png" border="0" /> You have to play around a bit with the size of the text, but I guess anyone can do it alone, so I will move on ;) Since I want the text to be on top, I move the layers for the updates (MAL layer, MAL updates layer) a bit down (to select both click on them while holding Ctrl key). I want the text to be in two rows, so I made a new text layer out of "upadtes:" and move it around. Now I will change the text color. Use the text tool again, and click on the color <img src="http://i112.photobucket.com/albums/n174/Zurui_Usagi/tutorial/49.png" border="0" /> and set it to the color of your choice. I will use the color that I originally used for the MAL updates part. After that I set the text layers to Color Dodge and lower opacity to 70% (note: I moved the "Crimsonwill's" text a bit lower, so it'll be more readable) <img src="http://i112.photobucket.com/albums/n174/Zurui_Usagi/tutorial/51.png" border="0" /> (and I add my name on it too, 'cos I'm an egoist muwhaha >:P) Since the sig is unnecessarly big, I go to Edit>Canvas size, and set the width to 520 px. <img src="http://i112.photobucket.com/albums/n174/Zurui_Usagi/tutorial/52.png" border="0" /> And since I found 520 px still a bit to big, I cut out other 20 px :D <img src="http://i112.photobucket.com/albums/n174/Zurui_Usagi/tutorial/53.png" border="0" /> Step 6. - Adding a border Most of the sigs newbies make are missing this. Border is not a must, but most signatures look better with it. Making a border is basically the same as it was for the MAL updates border, only that here we will select the whole canvas, and make a stroke on a new layer with the location "Inside". (Make sure, the new layer is above every other layer) <img src="http://i112.photobucket.com/albums/n174/Zurui_Usagi/tutorial/54.png" border="0" /> Now I basically make the same thing I made with MAL border. With this I basically have the sig ready, I just have to slice it up. <img src="http://i112.photobucket.com/albums/n174/Zurui_Usagi/tutorial/55.png" border="0" /> Step 7. - Slicing I won't detail this steps, 'cos aero made a really nice tutorial for it already. Take a look at it under this post. So with this, we have our sig ready. Hope it was understandable, and it helped at least someone a bit :) END OF PHOTOSHOP TUTORIAL --------------------------------------------------------------------------------------------- - If you require further help and/or have questions you want to ask, please post them here. - If you want to request a signature made for you please visit here: Request a Signature / Avatar / Profile Picture Club * If anyone has written up a tutorial similar to this using other programs (i.e. GIMP, Paintshop), feel free to PM me so that I can add yours to this post. Mod edit: removed links |
BrandonAug 10, 2018 12:44 AM
 |
This topic has been locked and is no longer available for discussion.
Dec 14, 2008 2:32 PM
#2
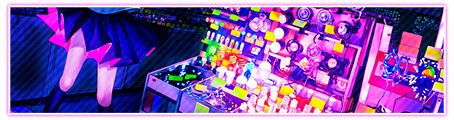
HOW TO SLICE A SIGNATURE ------------------------------------------------------------------------------------------------ :: PHOTOSHOP TUTORIAL BY AERO :: Basically what you have to do is divide your sig into parts. Depending on your signature, you may have a different number of splices, but generally you would have 5 like mine. 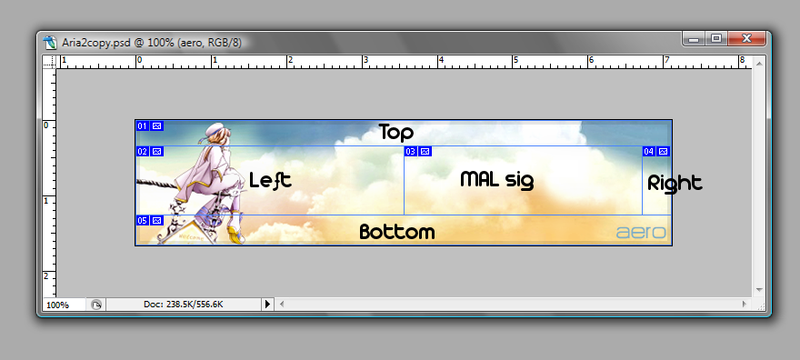 This can be done using the splice tool in PS. 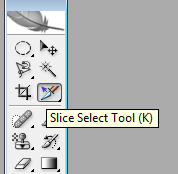 Once your sig has been divided, go to save for web 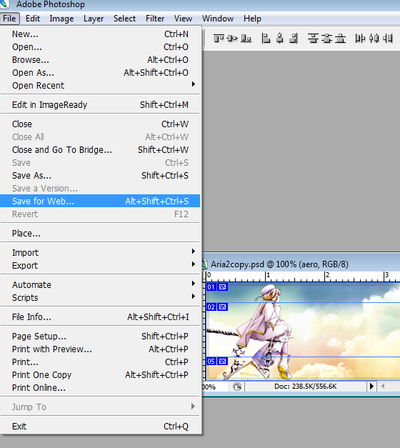 Select all the splices 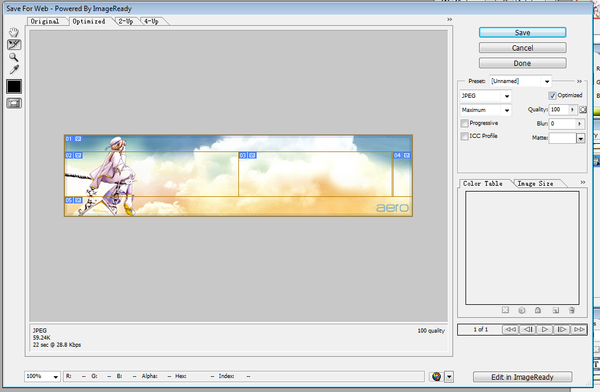 Choose a folder to save. It will save your spliced image into parts. Remember the part where you want your text to go. If you can see the numbers in the image, the part where my text goes is Part number 3. Note: When splicing the MAL sig the width is 260 pixels. Height depends on how many list entries you want to display. But some dimensions are: 1 entry = 39 pixels 2 entries = 58 pixels 3 entries = 76 pixels 4 entries = 94 pixels 5 entries = 113 pixels List sizes without the "recent updates" title (Thanks to SoraQuasar): 1 entry = 25 pixels 2 entries = 44 pixels 3 entries = 62 pixels 4 entries = 80 pixels 5 entries = 99 pixels Now, if we look back at my splices, the part that says "MAL Sig" will become my background for the text to go on. All the other parts (TOP, LEFT, RIGHT, BOTTOM), you will have to upload to a image hosting website like imageshack or photobucket. I use my DA account and put everything in my scraps. Next part is to build the sig, i advice you to open up notepad for this. Most people are confused as to HOW to actually use the 5 parts of the image. To put it simply, it is like lego. The TOP goes at top, LEFT goes left and etc. Simply when you put it together, the images need to fit like this: TOP LEFT MALSIG RIGHT BOTTOM To put it in BBcode form it would look something like this: Replace all ( ) with [ ] (img)http: //wtf.com/TOP.jpg(/img) (img)http: //wtf.com/LEFT.jpg(/img)(Copy and paste the "MAL Signature Code" here)(img)http: //wtf.com/RIGHT.jpg(/img) (img)http: //wtf.com/BOTTOM.jpg(/img) After typing that, copy all of that and paste in the Signature box: 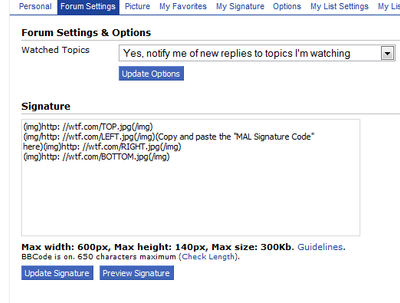 Signature Restrictions 6) Total sizes of forum signatures that include the dynamic MAL signature image are 600px width and 140px height. 7) Your entire signature must not exceed 300kb in size. Hope this helps someone. :: END OF TUTORIAL :: :: GIMP TUTORIAL BY MATHES ::    select the above part with the cut tool, then double click make it happen.  save this now as yourName-TOP.png or something similar Undo your previous actions and repeat it with the next part, till you have all five.  :: END OF TUTORIAL :: ------------------------------------------------------------------------------------------------ - If you require further help and/or have questions you want to ask, please post them here. *Same thing, if you have a slicing tutorial for another program, please PM me. |
aeroDec 15, 2008 3:51 AM
|
Jan 8, 2009 3:07 AM
#3
HOW TO ASSEMBLE A SLICED SIGNATURE ------------------------------------------------------------------------------------------------ :: TUTORIAL BY saka :: Assembling a Sliced MAL Forum Signature This guide will walk you through assembling a sliced MAL signature and configuring your MAL profile settings so that your signature displays correctly. This guide does not show you how to slice a new signature, and assumes you have generated all the necessary images already in the correct dimensions. To give you a better idea, the layout of a custom mal signature is generally a single MAL-generated signature image surrounded by other images in a grid. For example:  So, let's get started putting the pieces together! Step 1: Save the Images Most of the time in this club, your sliced images will be provided to you by someone else through a forum post. You should save each of them to a folder somewhere on your computer where you can get them easily later. That way you'll have a backup of them should you ever need to upload them again later. Step 2: Configuring the MAL Part Since we just want to use the minimum update text, we want to configure it so that MAL only produces the minimum list text for our signature, and uses our custom-sliced background image. Usually your settings will be as follows:
Step 3: Hosting the Surrounding Images The mal background part is hosted by myanimelist.net, but the surrounding images are not. It's likely that the person who provided the images to you has already uploaded them to an image sharing site, in which case you can probably use the image urls they provided. You can get the url for each image by right-clicking on it in the forum post and choosing to view the image properties. If you sliced your signature yourself, you'll have to find a place to host them online, and make note of each of their image urls. If you're new to image hosting, click the spoiler for more instructions... So, let's get these images online!.... You should have saved all the image slices to a folder somewhere on your computer already. We need to upload each of them to a public webserver so that other people on the Internet can see them. Many sites let you host images online for free, and some of the popular ones are listed below:
For each one of your images, select and upload each of the images for your sig. You'll need the "Direct" url to each image, which should be given to you after uploading each image. In TinyPic it's listed as "Direct Link for Layouts" after uploading... In ImageShack, after uploading, click to "Show Advanced Linking" at the bottom and it will give the direct link... In Photobucket, you will see the direct link by hovering over the image in your albums. As of this writing, TinyPic has a higher bandwidth limit than ImageShack for anonymous hosting. Regretfully, TinyPic only supports jpeg images so no transparency or animations will work, which is why you may need to use one of the others. If you're a Windows user, you may find it easier to use TinyPic/ImageShack Uploader (written by fellow mal user and resident diety Kotori), which lets you upload directly to TinyPic, ImageShack, or MessyShare. It has context menu support, so you can just right click the image's folder icon and upload more conveniently. Step 4: Putting It All Together in BBCode: If you've been around forums at all you'll recognize bbcode, but you'll get used to it quickly if you are new to the concept. You basically write special markers (tags) into your text that are interpreted by the forum to change how the text is displayed, or to insert special objects like images. The tags we'll be using to construct a signature are mainly the [img] and [url] tags. You can learn more about the bbcode supported by mal here. The basic code template for a sliced mal signature: [url=http://myanimelist.net/animelist/USERNAME&sclick=1][img]http://yourimagehost/top.png[/img] [img]http://yourimagehost/left.png[/img][img]http://myanimelist.net/signature/USERNAME.png[/img][img]http://yourimagehost/right.png[/img] [img]http://yourimagehost/bottom.png[/img][/url] Sometimes, there will be fewer images if the mal part is along an edge, so you may not need all of the pieces. For example, if the MAL part fits along the bottom right corner, there would be no need to have right or bottom images. Ask the creator of the signature if you need help formatting it properly.  Important Note about newlines about your bbcode: The location of the return characters (Enter key on your keyboard) does affect how the signature is displayed. Stray returns or spaces in your signature code will make spaces between images. For best results, there should be no spaces anywhere in your code except a single return after each row of images except the last.... so... [img]...top[/img]return If the returns are omitted there, Internet Explorer does not wrap them properly, expanding the forum in a nasty way -- so make sure you put them in! The returns are already in the bbcode template earlier in this tutorial, so you can safely copy/paste that one to use as a starting point. Browsers other than Internet Explorer do not have this wrapping problem.[img]left[/img][img]malpart[/img][img]right[/img]return [img]bottom[/img] :: END OF TUTORIAL :: ------------------------------------------------------------------------------------------------ - If you require further help and/or have questions you want to ask, please post them here or at the the club. |

aeroJun 28, 2009 8:54 PM
|
Jun 5, 2009 5:13 PM
#4
HOW TO CREATE A SCRIPTED SIGNATURE ------------------------------------------------------------------------------------------------ :: TUTORIAL BY ehrgeiz :: Tutorial: Generating images using php and the MAL-RSS-feed IMPORTANT NOTE: before posting in this thread seeking for help, or writing me a IM with pleadings for help, read this tutorial carefully!!! About 80% of the questions i get via IM have already been answered in one of the first three posts of this tutorial. I am not saying that you have to read through all the sites to get a working solution for your problems but a minimum of effort should be put into searching answers by yourself. As of now, i won't answer any messages containg phrases like:
If this sounds rude to you, i honeslty apologize. But i'm getting so many pointless questions or questionts that i have answered at least a dozen times that i don't want to answer them anymore. If you have any other questions (except those few i mentioned above) go ahead and ask. Tutorial: Generating scripted-signatures (Version 2)d (( the first version can still be found here: http://myanimelist.net/forum/?action=message&msgid=2272294 or here: http://myanimelist.net/blog.php?eid=21699 )) Before the show starts: Thats the second try.I think it became a lot better. This was possibledue to some really good feedback and suggestions i got. So keep this up!. If you have any questions about this tut or you have any ideas how to improve it let me know. Improvements can never be a bad thing.
----------------------------------- Full source files of this tutorial you will need: download (contains the tutorial as pdf file) (be sure to keep the given structure intact when you upload the files to your webspace) [when you unzipped the source, uploaded it, and made everything correct you should get an output according to the one you see below) This tutorial is for those of you, who want a scripted signature that uses a non-MAL custom font. An example how it can look like:  1. Starting notes The script we will make during this tutorial is neither the best, nor the last answer on how to create a scripted signature. There are more advanced scripts out there, which do more than just the basic things provided by this tutorial. Nevertheless you will be able to make a working, customizable scripted signature that can easily be upgraded with more functions. For more advanced script try taking a look at the „Signature Scripters“ Club (http://myanimelist.net/clubs.php?cid=5076). If something is unclear, or you just don't know how to do a certain step feel free to post below. Suggestions and criticisms are also welcome. 2. What you will need to successfully pass this tutorial:
Plusses to have on your side: basic knowledge of webdesign and or php-programming (this is not a 'need to have'); basic knowledge of ftp-clients or how to upload files on a webserver and how to alter chmod of files So, if your still here, then you are seriously interested in how to script your own flashy signature. Thats good! Lets start then. First of all, you will need a signature graphic that you like. So go on and choose one. Come back to this tutorial if you have done so. 3. Changes in this version Your reading the second version of this tutorial and as a matter of fact there have been some minor and also some major changes. First of all, there is no longer only one big file holding the script but three slightly smaller files. But don't worry if anything, the script has become easier to handle, the aim still is to keep it clear, simple and easy to handle. All changes will be marked red. The scripts know exists of the following files
Attention: For easier and faster access for those who already read the first version of this tutorial all changes i made are marked red. So if you see a red part be aware that this has changed of wasn't even supported in the last version. One last point to mention. Because this post is kinda big, and will (if everything goes as planned) become even bigger, i will split it up in more parts. So..this post holds all information you need to start with. The second post holds the actual tutorial and the thirds posts will be dealing with FAQ's and Bonuses such as advanced image and text handling using php. -------------------------------------------------------------------- 4. Setting up the script I will take you step by step through the setup process. To start with, download the zip file from the link above and extract it. Here's the link once more: download Fire up your ftp-client and upload all the files to your webspace. It is very important that you keep the given file-structures intact. This done, set the following chmods:
(Note:with a standard ftp-client you can change a files/folders chmod like that: right click on a file or folder, choose 'chmod' in the appearing contextmenu.The rest should be self-explanatory) Open a browser of your choice and open the url: 'yoursite.com/signature//sig.php' If your host matches all requirements, and you have done everything right, you should see something like this: Congratulations!! You have taken the first steps in creating a custom signature... Before we start with creating your own personalized sig, we have to do some more homework. Let's get started.... 5. Vital source-code parts in detail The following part is located in the file „image_output.php“. Be aware that the file „sig.php“ should never ever be changed unless you really know what you do. Otherwise the whole script is likely to break. If you open the spoiler-tag you will see some source-code of the sig-script we're using right now. Cause it is vital for you to understand this part of the script to generate your own custom sigs, i will explain it in detail. $image = imagecreatefrompng("your_pic.png"); $font = 'Capture_it'; $colour = imagecolorexact($blub,0,0,0); imagefttext($image,14,0,118,48,$colour,$font,$titles[0][0]); imagefttext($image,12,0,170,60,$colour,$font,$status[0][0]); imagefttext($image,14,0,222,72,$colour,$font,$dates[0][0]); imagepng ($image)
6. Creating your own customized signature I guess right now, you have chosen, the gfx you want to use as a signature. If not, do so now and come back when your done with that. As before, i will take you step by step through the whole process. Due to the fact, that we have to change the source code, you will have to open the file 'image_output.php' in any texteditor you like. Next you have to find the part that looks like this:
Now: replace ("your_pic.png") with the name of the sig-gfx you'd like to use e.g. if the png you want to use is called „flashy.png“ you would have to change ("your_pic.png") to ("flashy.png"). [easy isn't it ^^] For now, leave the rest as it is. Save the file and upload the changed 'settings.php' and your sig-gfx to your webspace. For information on how to change the font or how to make more than one anime title appear on your sig read point 4. If you're satisfied with the outcome there is merely one thing left. Open the file 'settings.php' in any texteditor you like. Find the following line:
Save the file. You may notice, that there are some other settings that can be changed by you and will influence the appearance of your signature. All you need to know to make successfull working changes is explained in detail behind every line. If you still have problems understanding what some things mean or how to adjust them ask. Once again. Upload the file 'settings.php' to your webspace. Browse to 'yoursite.com/signature/sig.php'. If you get an error like „The Image „your-image“ cannot be displayed because it contains errors“ don't start to panic. Instead open the following url: 'yoursite.com/signature/sig.png' If you get an output everything worked fine. If you have chosen to save the png-output of the sig-creation process, and you want to use this saved png-file instead of the raw 'php-site' as your sig you have to do one more thin. (read under point 4 how to save the png-output) That is to automate the update of your signature. Read under point 6: cronjob, how to achieve this. 7. More Information on how to setup the serverside direcotories and how to automate the sig-generating process
8. Possible errors and how to handle them Error: The Image „your-image“ cannot be displayed because it contains errors Solution: Thats not really a problem. The output png should have been compiled correctly. Error: There is no output png saved. Solution: Upload a file with the same name you defined for your output png. E.g. if you named it 'sig.png' upload a file 'sig.png' and start the script once more. Make sure the files chmod is set to 755. Error: There is a png output, but no information appears on it. Solution: Check if your hoster allows 'allow_url_fopen'. Must be set to 'on'. You can check this in the phpinfo. Error: I get a weird looking php error. Solution: Make sure the files 'sig.php', 'settings.php' and 'image_output.php' have their chmod set to 755 and the folders chmod is set to 777 or 757 --------------------------------------------- 9. Frequently Asked Questions
10. Advanced image and text handling under construction 11. Sigs created using this tutorial Some impressions for the interested one how possible outcomes can look like. Thanks to all of you, who gave their sigs away as samples. dEVJE: Queeg:   :: END OF TUTORIAL :: ------------------------------------------------------------------------------------------------ - If you require further help and/or have questions you want to ask, please post them here. - If you find the above a bit tricky, you could use this great free service that GreatS has kindly provided to create your own scripted signature: http://dygnatus.greatslovakia.com/ |
aeroJun 5, 2009 5:20 PM
|
Aug 13, 2009 1:09 AM
#5
GENERAL SLICING TUTORIAL ------------------------------------------------------------------------------------------------ :: TUTORIAL BY Xassite :: For all Profiles/Signatures/ Whatever shit you have. Don't understand? Ask me in my profile.          :: END OF TUTORIAL :: ------------------------------------------------------------------------------------------------ - If you require further help and/or have questions you want to ask, please visit Xassite's profile. |
|
This topic has been locked and is no longer available for discussion.
More topics from this board
» 【 ART THREAD 】Let's share our art! ❤︎ ( 1 2 3 4 5 )mewmewforever - Aug 30, 2024 |
204 |
by Outfiltrator
»»
3 hours ago |
|
» Four Ages!Robert_SS_Gordon - Feb 21 |
47 |
by Robert_SS_Gordon
»»
Yesterday, 9:17 AM |
|
» AniTaste - cross-site anime list comparatorMciej - Sep 21 |
1 |
by Retro8bit
»»
Sep 21, 5:29 PM |
|
» Saeryen's Songs!Saeryen - Jul 25 |
5 |
by Saeryen
»»
Sep 20, 1:54 PM |
|
» Share Your YouTube Channel/Videos! ( 1 2 3 4 5 ... Last Page )nin-tendo - Dec 16, 2022 |
584 |
by Senery
»»
Sep 20, 10:01 AM |