New
Jan 10, 2013 4:48 PM
#1

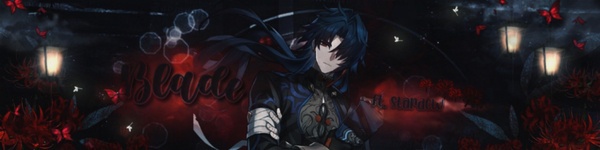
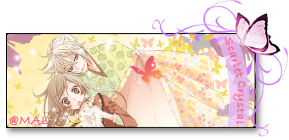
| This video is a bit outdated, please refer to the new tutorial and video: https://myanimelist.net/forum/?topicid=1761000 This topic on Customizing your profile is part of our BBcode Tutorials section: http://myanimelist.net/forum/?topicid=419453 Skip ahead to the steps YOU need in the video! :00 intro :35 What is a profile graphic- examples of what you can do with one! 2:06 Where to get a free program to make one (GIMP) 2:40 How to make the profile graphic image 7:20 Adding descriptions and text 11:40 Adding buttons to it 14:38 How to split the design into pieces so you can add links to them 17:50 How to upload the graphic and add links to it 23:32 How to add links to the parts in your profile edit box This is my tutorial video to take you through every possible step of making your own About Me graphic with your description, buttons, then uploading it and adding the links! It was too much info to put into text and it will be way easier for you when you see me do it live! You don't need any experience with design since I take you thru the whole process and you can follow along. You can still follow up with questions in this topic, but here's some frequently requested links! Getting your own Message and Friend Request urls Your 'Message me' url Log out and go to your own profile page. Right click "Send Message" under your own avatar and choose "Copy Link Location". I'd recommend copying it to Notepad in case you need it later. Example from my profile: http://myanimelist.net/mymessages.php?go=send&toname=Shishio-kun Your 'Friend me' url Log out and go to your own profile page. Right click "Send Friend Request" under your own avatar and choose "Copy Link Location". I'd recommend copying it to Notepad in case you need it later. Example from my profile: http://myanimelist.net/myfriends.php?go=add&id=294850 Adding a Youtube video in the middle of the profile graphic Make your profile design like normally, except include a space in your graphic that is 425px in width and 355px in height. This is where your Youtube video will go later. Export and/or slice the entire graphic normally and make sure you cut out the space exactly this size when you export/slice the entire profile graphic. When you post the BBcode, replace the image BBcode for the space (the one that's 425px wide 355px high) with a Youtube video BBcode. btw: to post a Youtube video, use the numbers/letters after v= on the URL address for your video. This goes between [yt][/yt] BBcode tags. For example: [yt]4ihRXNyoYWQ[/yt] For example, this is the profile graphic before the Youtube video. I've set aside a space that's 425 x 355. I need to make sure I cut out the space perfectly this size when I export the entire profile graphic.      Here's the BBcode for it: [img]http://i.imgur.com/NCfWOCt.png[/img] [img]http://i.imgur.com/3oB6sZm.png[/img][img]http://i.imgur.com/wc3bM8c.png[/img][img]http://i.imgur.com/onGEB4A.png[/img] [img]http://i.imgur.com/Pwd08VX.png[/img] The Youtube video I want to add is this: Here's the code below for how I embedded the Youtube video. You can go to the page for the video here: https://youtu.be/4ihRXNyoYWQ I added the 4ihRXNyoYWQ from the URL in between [yt][/yt]. [yt]4ihRXNyoYWQ[/yt] Now, I simply add the Youtube video's BBcode and use it to replace the 425 x 355 piece (this one: [img]http://i.imgur.com/wc3bM8c.png[/img]. You can see the code for it below. notice I replaced [img]http://i.imgur.com/wc3bM8c.png[/img] with the Youtube Bbcode. [img]http://i.imgur.com/NCfWOCt.png[/img] [img]http://i.imgur.com/3oB6sZm.png[/img][yt]4ihRXNyoYWQ[/yt][img]http://i.imgur.com/onGEB4A.png[/img] [img]http://i.imgur.com/Pwd08VX.png[/img] Design program links To download GIMP, the program I used in the video, go to this link if you couldn't find it on your own. http://www.gimp.org/downloads/ Remember after you download it completely, you need to click on the file downloaded and Run it to install it. After you hit Finish, find the program in your All programs under GIMP or GIMP2 and click it there to start it! It also may be on your Taskbar with the GIMP icon. Then you can begin Step 1 and make your own graphic! Easier program to split designs with http://www.oldversion.com/windows/macromedia-fireworks/ I personally use Macromedia Fireworks 8 alot as its an old staple of mine and very useful for web design even to this day! Free trials for it are available all over the web. It has a better splitting option then GIMP. It might be worth looking into! View the profile graphics used in the video + their BBCode! It was made for my longtime friend Galaxia20. You can always look at the graphics and BBcodes here: I can't give you the raw BBcode for this design since its intended for her. But thru these links you'll find two profile designs including the one I edited which you see Kyon use at the end! They also include the BBcode for you to copy! http://myanimelist.net/forum/?topicid=393503&show=0 http://myanimelist.net/forum/?topicid=393503&show=20#msg14625661 Show off your design when done! I would love to see what you do with this video and comment on it. When finished, be sure to post here or in our show off topic: http://myanimelist.net/forum/?topicid=318547 |
Shishio-kunApr 21, 2022 2:05 PM

Jan 13, 2013 6:55 AM
#3

| Shishio-kun the video you made explained a lot thank you for sharing it with us. |
Jan 20, 2013 10:02 PM
#4
| Hm, sorry, this may seem weird, but what do I do next during the downloading the GIMP when a box comes up saying: Completing the GIMP Setup Wizard I press Finish, and nothing comes up, so I don't know if I should....? |
Jan 20, 2013 11:08 PM
#5
FuyuChan1111 said: Hm, sorry, this may seem weird, but what do I do next during the downloading the GIMP when a box comes up saying: Completing the GIMP Setup Wizard I press Finish, and nothing comes up, so I don't know if I should....? ? If you should what? You'd see Gimp Setup Wizard during the installation process, not the downloading process. After its installed and you can hit finish, you start up the program. Look for its icon/name/folder on your taskbar or under All Programs on the Start Menu of your computer and start/Run it from there so you can begin the steps. |
Jan 21, 2013 9:53 AM
#6
Shishio-kun said: FuyuChan1111 said: Hm, sorry, this may seem weird, but what do I do next during the downloading the GIMP when a box comes up saying: Completing the GIMP Setup Wizard I press Finish, and nothing comes up, so I don't know if I should....? ? If you should what? You'd see Gimp Setup Wizard during the installation process, not the downloading process. After its installed and you can hit finish, you start up the program. Look for its icon/name/folder on your taskbar or under All Programs on the Start Menu of your computer and start/Run it from there so you can begin the steps. Oh I see - that's what I meant to ask. Thanks! |
Jan 21, 2013 5:09 PM
#7

| Thanks a bunch! |
Alone on a Friday night? Remember that DIO did nothing wrong! |
Jan 21, 2013 5:39 PM
#8
| Hey everyone I've added links so you can shortcut to the individual steps, now its even easier to navigate! |
Jan 29, 2013 2:55 PM
#9

| Nicely structured video! :D Thanks for the effort! |


Jan 30, 2013 12:53 AM
#10

| Nice video tutorial, but one little thing, you say .com and animelist is .net .. I use autocomplete from the browser cuz I always type that... |
Jan 30, 2013 8:57 PM
#11
al_exs said: Nice video tutorial, but one little thing, you say .com and animelist is .net .. I use autocomplete from the browser cuz I always type that... OK, I'm going to redub that one part and edit the title card then. This will be like the eleventh time I've had to reupload this video due to needing to make some change lol. |
Mar 2, 2013 7:23 PM
#12
| Bump? Bump. Ahhh thanks for the tut! I'm glad to see it uploaded and I hope it helps out the newbies on MAL with their profiles! I mean, I didn't need it, but it warms my heart that someone would make a twenty-six minute video for this! I never knew about the GIMP guillotine btw, and I've been GIMP for two years! I always cropped my buttons and links the hard way (measuring with the Select tool and cutting them out one-by-one!). |
Mar 5, 2013 2:08 PM
#13
MegumiYukimura said: Bump? Bump. Ahhh thanks for the tut! I'm glad to see it uploaded and I hope it helps out the newbies on MAL with their profiles! I mean, I didn't need it, but it warms my heart that someone would make a twenty-six minute video for this! I never knew about the GIMP guillotine btw, and I've been GIMP for two years! I always cropped my buttons and links the hard way (measuring with the Select tool and cutting them out one-by-one!). Yeah thanks for the bump. It has been extremely successful and ppl finally are getting it right. btw the Guillotine tool in Gimp is great but Macromedia/Adobe Fireworks has a even better cutting tool, however its not free like Gimp tho and as noob friendly so I didn't use it in this video. I'm sure Photoshop probably has a superior cutting tool as well. |
Mar 8, 2013 2:17 PM
#14

| is there an easier way to get the links on my pics? it feels very tedious for me D: Also is there any advice you can give me to make my profile thing look better? I feel that the backgrounds of the pictures kinda make it weird looking... if you know what i mean. |
 |
Mar 8, 2013 2:47 PM
#15
Fryth said: is there an easier way to get the links on my pics? it feels very tedious for me D: Also is there any advice you can give me to make my profile thing look better? I feel that the backgrounds of the pictures kinda make it weird looking... if you know what i mean. I can't think of any ways. I have my own shortcuts using Wordpad's replace feature but its hard to explain and probably more trouble learning that just doing it manually. There might be a program like an editor you can use for it, but then you might also have to learn that editor just to make this more convenient. Maybe someone else can come up with something to help you tho. Your graphic looks fine but tbh when ppl have that many pics of characters I stop looking at them after the first few. I think its best to go with one big, well defined character or a few selected characters to keep every part of the profile graphic interesting. Also the text is a little hard to read. |
Mar 8, 2013 4:32 PM
#16
Shishio-kun said: Fryth said: is there an easier way to get the links on my pics? it feels very tedious for me D: Also is there any advice you can give me to make my profile thing look better? I feel that the backgrounds of the pictures kinda make it weird looking... if you know what i mean. I can't think of any ways. I have my own shortcuts using Wordpad's replace feature but its hard to explain and probably more trouble learning that just doing it manually. There might be a program like an editor you can use for it, but then you might also have to learn that editor just to make this more convenient. Maybe someone else can come up with something to help you tho. Your graphic looks fine but tbh when ppl have that many pics of characters I stop looking at them after the first few. I think its best to go with one big, well defined character or a few selected characters to keep every part of the profile graphic interesting. Also the text is a little hard to read. Ya i should try to downsize it a bit ;3' btw thanks for the vid and reply ^^ |
| |
Apr 6, 2013 11:15 PM
#17
GoldenBRS said: | 4 hours ago Can someone help me why this isn't working?           I can see some pieces are missing below "friend me", so you probably didn't upload some and add it with these. You have to really carefully follow the steps and make sure you upload and use every piece. |
Shishio-kunApr 6, 2013 11:22 PM
Apr 7, 2013 9:31 AM
#18
Shishio-kun said: GoldenBRS said: | 4 hours ago Can someone help me why this isn't working? I can see some pieces are missing below "friend me", so you probably didn't upload some and add it with these. You have to really carefully follow the steps and make sure you upload and use every piece. Ok I fix the layout, and now it looks perfect.             Thank you very much! You are a life saver! |
May 12, 2013 10:49 AM
#19

May 12, 2013 2:22 PM
#20
F4it said: Hello guys, I have followed exact steps of the video, but I have this problem that no matter how, my images wont go to the places as I wanted. See it Here And This is how it is supposed to look like. Anyone please help me? Thanks! Your graphic is 750px across or so- it exceeds the width recommended in the video: 640px. Pieces of a graphic over this amount won't fit on a line normally in the current MAL About Me. The most you can go these days is 690px for total piece width I think. To get around this, you can use the "[/center] glitch" but its not guaranteed to work forever and might throw off other things on your profile later. You just put [/center] before a profile About Me code and as far as I've seen it allows you to use pieces with a total wdith wider than usual. Also pieces 2 3 and 4 appear to add up to 748px in width. Piece 1 and 5 are 750px across. So you're missing 2px on the second line and it will throw the design off. |
May 13, 2013 2:38 AM
#21
Shishio-kun said: F4it said: Hello guys, I have followed exact steps of the video, but I have this problem that no matter how, my images wont go to the places as I wanted. See it Here And This is how it is supposed to look like. Anyone please help me? Thanks! Your graphic is 750px across or so- it exceeds the width recommended in the video: 640px. Pieces of a graphic over this amount won't fit on a line normally in the current MAL About Me. The most you can go these days is 690px for total piece width I think. To get around this, you can use the "[/center] glitch" but its not guaranteed to work forever and might throw off other things on your profile later. You just put [/center] before a profile About Me code and as far as I've seen it allows you to use pieces with a total wdith wider than usual. Also pieces 2 3 and 4 appear to add up to 748px in width. Piece 1 and 5 are 750px across. So you're missing 2px on the second line and it will throw the design off. Thanks, I think I wont resize those images, since i dont know how to resize an animated gif image. However the center glitch works really well for now :D Here |
KriegWurstMay 13, 2013 4:15 AM
May 17, 2013 8:35 AM
#22

| Thanks for the video, really easy to create. I will try different chips ^ _ ^ |
 |
Jun 2, 2013 7:01 PM
#23

| I must say thanks for the easy to understand video which also included some GIMP elements!! It really made it easier for me! |
   |
Aug 22, 2013 7:31 AM
#24

| How do I find the link to "Friend me"? Don't know where to find it since I can't add myself as a friend xD http://myanimelist.net/profile/Zura-san |
 |
Aug 22, 2013 7:35 AM
#25

| This is the friend you link ^^ http://myanimelist.net/myfriends.php?go=add&id=2294229 and awesome video. |
StardewAug 22, 2013 7:41 AM
Aug 22, 2013 7:48 AM
#26
Ranoom said: Thanks :)This is the friend you link ^^ http://myanimelist.net/myfriends.php?go=add&id=2294229 and awesome video. |
|
Aug 31, 2013 2:36 PM
#28
| Thanks a lot for your tutorial :D All the tutorials are great and your club is awesome, take a look at my profile, i've struggled to make it out, but it's worth of the time spent on it :) http://myanimelist.net/profile/Hazanka |
Sep 9, 2013 1:40 PM
#29
| I don't really get on how to suppose to bring the background into the character part. When I tried to do it, it brings the result that the character I want to put on is small compared to your's. That is quite frustrating on trying to do that one. |
GbluestarHSep 9, 2013 1:43 PM
Sep 9, 2013 2:08 PM
#30
GoldenthunderBRS said: I don't really get on how to suppose to bring the background into the character part. When I tried to do it, it brings the result that the character I want to put on is small compared to your's. That is quite frustrating on trying to do that one. Hmm like this: restart Gimp, drag the background into the program, then the render into program the background. It should let you drag it around as in video. If not, maybe your picture's sizes aren't large enough. How large are the background and render? It will say on the image files when you right click them. |
Sep 9, 2013 2:18 PM
#31
Shishio-kun said: GoldenthunderBRS said: I don't really get on how to suppose to bring the background into the character part. When I tried to do it, it brings the result that the character I want to put on is small compared to your's. That is quite frustrating on trying to do that one. Hmm like this: restart Gimp, drag the background into the program, then the render into program the background. It should let you drag it around as in video. If not, maybe your picture's sizes aren't large enough. How large are the background and render? It will say on the image files when you right click them. I did all of that and it leads me into this. http://i41.tinypic.com/awu9z4.png 0_o Resize the render picture like the background? And I check the sizes by the original pictures. It says 1903 X1892 for the background render 225 X 350 after I resized it to the MAL size. |


Jan 16, 2014 5:26 AM
#33
| I wanted to try to add links to pictures but it sure doesn't look right (see here - myanimelist.net/profile/I_am_Mika). Did I do something wrong? P.S. sorry for my English. |
Jan 16, 2014 6:40 AM
#34

I_am_Mika said: I wanted to try to add links to pictures but it sure doesn't look right (see here - myanimelist.net/profile/I_am_Mika). Did I do something wrong? P.S. sorry for my English. I'm not sure but it might be because of the "!" at the end of the link. You can use http://myanimelist.net/anime/4722 instead of http://myanimelist.net/anime/4722/Skip_Beat! Hope that solves it :) |

Jan 16, 2014 7:23 AM
#35
kuronekodesu said: I_am_Mika said: I wanted to try to add links to pictures but it sure doesn't look right (see here - myanimelist.net/profile/I_am_Mika). Did I do something wrong? P.S. sorry for my English. I'm not sure but it might be because of the "!" at the end of the link. You can use http://myanimelist.net/anime/4722 instead of http://myanimelist.net/anime/4722/Skip_Beat! Hope that solves it :) It works now. Thanks :) |
Jan 25, 2014 10:08 AM
#36

| You sir, are a hero. THAAAAAAANKS~ |
| It... it would be an honor to be killed by your cooking, Mistress Rumi! |
Feb 1, 2014 8:52 PM
#37
| I have found this post very helpful and insightful. Thank you! |
Feb 11, 2014 12:31 PM
#38
| So when im doing the background image, Does the pictures height have to be larger than the width? |
Feb 11, 2014 12:51 PM
#39
ChaoBaka said: So when im doing the background image, Does the pictures height have to be larger than the width? no, but youll get a horizontally rectangular about me without much room for buttons text and renders. if its enough space for you tho it will be fine |
May 1, 2014 12:25 PM
#40

| Hi, when putting the links onto the 'about me' section from photobucket, is the link suppose to look like this? Because in the tutorial, the links don't have [URL] around them. -  Here's a visual: http://i60.tinypic.com/29n8dw3.png |
 "Later on, you will become a lively person causing headaches as the shrine-god." |
May 1, 2014 2:00 PM
#41

ScarletCrystal said: Copy the direct link and put [img] tags around it.Hi, when putting the links onto the 'about me' section from photobucket, is the link suppose to look like this? Because in the tutorial, the links don't have [URL] around them. - Here's a visual: http://i60.tinypic.com/29n8dw3.png Although, it really isn't safe to edit your profile right now. |
May 1, 2014 5:43 PM
#42
Nerveri said: ScarletCrystal said: Copy the direct link and put [img] tags around it.Hi, when putting the links onto the 'about me' section from photobucket, is the link suppose to look like this? Because in the tutorial, the links don't have [URL] around them. - Here's a visual: http://i60.tinypic.com/29n8dw3.png Although, it really isn't safe to edit your profile right now. Thanks, but I've copied the direct link and put [img] tags around it. Now it just shows plain text - the exact text I put in, in order for the image to show up. See here: http://i58.tinypic.com/123tp9d.png Also thanks, but I've also heard it's been resolved: [last comment on page] http://myanimelist.net/forum/?topicid=1155749&show=220 |
"Later on, you will become a lively person causing headaches as the shrine-god." |
May 2, 2014 10:54 AM
#43
ScarletCrystal said: Nerveri said: ScarletCrystal said: Copy the direct link and put [img] tags around it.Hi, when putting the links onto the 'about me' section from photobucket, is the link suppose to look like this? Because in the tutorial, the links don't have [URL] around them. - Here's a visual: http://i60.tinypic.com/29n8dw3.png Although, it really isn't safe to edit your profile right now. Thanks, but I've copied the direct link and put [img] tags around it. Now it just shows plain text - the exact text I put in, in order for the image to show up. See here: http://i58.tinypic.com/123tp9d.png Also thanks, but I've also heard it's been resolved: [last comment on page] http://myanimelist.net/forum/?topicid=1155749&show=220 They still accept images from Photobucket, but there's something about your images url link that is rejected. I am looking for why now |
May 2, 2014 11:23 AM
#44
Shishio-kun said: ScarletCrystal said: Nerveri said: ScarletCrystal said: Copy the direct link and put [img] tags around it.Hi, when putting the links onto the 'about me' section from photobucket, is the link suppose to look like this? Because in the tutorial, the links don't have [URL] around them. - Here's a visual: http://i60.tinypic.com/29n8dw3.png Although, it really isn't safe to edit your profile right now. Thanks, but I've copied the direct link and put [img] tags around it. Now it just shows plain text - the exact text I put in, in order for the image to show up. See here: http://i58.tinypic.com/123tp9d.png Also thanks, but I've also heard it's been resolved: [last comment on page] http://myanimelist.net/forum/?topicid=1155749&show=220 They still accept images from Photobucket, but there's something about your images url link that is rejected. I am looking for why now Oh, okay thank you |
"Later on, you will become a lively person causing headaches as the shrine-god." |
May 2, 2014 12:00 PM
#45
ScarletCrystal said: Shishio-kun said: ScarletCrystal said: Nerveri said: ScarletCrystal said: Copy the direct link and put [img] tags around it.Hi, when putting the links onto the 'about me' section from photobucket, is the link suppose to look like this? Because in the tutorial, the links don't have [URL] around them. - Here's a visual: http://i60.tinypic.com/29n8dw3.png Although, it really isn't safe to edit your profile right now. Thanks, but I've copied the direct link and put [img] tags around it. Now it just shows plain text - the exact text I put in, in order for the image to show up. See here: http://i58.tinypic.com/123tp9d.png Also thanks, but I've also heard it's been resolved: [last comment on page] http://myanimelist.net/forum/?topicid=1155749&show=220 They still accept images from Photobucket, but there's something about your images url link that is rejected. I am looking for why now Oh, okay thank you Here's my post in Support about it http://myanimelist.net/forum/?topicid=1155749&show=240#msg30451225 So basically, just rename your files to shorter URLs without characters like % or use another image host. I think MAL rejects URLs with certain characters in them. Just a idea tho, all I know is the sure solution is to use another image host and different named URLs. There's nothing wrong with the pics themselves or your account. Thanks for bringing this issue to my attn! I hope MAL will fix it. Do you remember how you got that file name? Is it cuz you uploaded them from a folder/desktop after using the Guillotine tool? |
May 2, 2014 12:24 PM
#46
Shishio-kun said: ScarletCrystal said: Shishio-kun said: ScarletCrystal said: Nerveri said: ScarletCrystal said: Copy the direct link and put [img] tags around it.Hi, when putting the links onto the 'about me' section from photobucket, is the link suppose to look like this? Because in the tutorial, the links don't have [URL] around them. - Here's a visual: http://i60.tinypic.com/29n8dw3.png Although, it really isn't safe to edit your profile right now. Thanks, but I've copied the direct link and put [img] tags around it. Now it just shows plain text - the exact text I put in, in order for the image to show up. See here: http://i58.tinypic.com/123tp9d.png Also thanks, but I've also heard it's been resolved: [last comment on page] http://myanimelist.net/forum/?topicid=1155749&show=220 They still accept images from Photobucket, but there's something about your images url link that is rejected. I am looking for why now Oh, okay thank you Here's my post in Support about it http://myanimelist.net/forum/?topicid=1155749&show=240#msg30451225 So basically, just rename your files to shorter URLs without characters like % or use another image host. I think MAL rejects URLs with certain characters in them. Just a idea tho, all I know is the sure solution is to use another image host and different named URLs. There's nothing wrong with the pics themselves or your account. Thanks for bringing this issue to my attn! I hope MAL will fix it. Do you remember how you got that file name? Is it cuz you uploaded them from a folder/desktop after using the Guillotine tool? Okay, thank you very much! Could I use TinyPic to upload the images? And then follow the rest of the tutorial? No problem, thanks again! And yes, I did get the file name uploading the images from a folder/desktop after using the Guillotine tool. |
ScarletCrystalMay 2, 2014 1:09 PM
"Later on, you will become a lively person causing headaches as the shrine-god." |
May 2, 2014 1:16 PM
#47
ScarletCrystal said: Okay, thank you very much! Could I use TinyPic to upload the images? And then follow the rest of the tutorial? No problem, thanks again! And yes, I did get the file name uploading the images from a folder/desktop after using the Guillotine tool. Yeah you can use Imgur or Tinypic, both are good. They have the links listed in the way it was on Photobucket at recording of the video. It looks like Photobucket also changed their layout since then. I'll try to add the updated info in annotations later after things cool down on MAL and the info is more solid. Its unfortunate this happens with the Guillotine/Slice tool, since alot of ppl use those tools for big profile graphics on About Me.. |
May 2, 2014 2:49 PM
#48
Shishio-kun said: ScarletCrystal said: Okay, thank you very much! Could I use TinyPic to upload the images? And then follow the rest of the tutorial? No problem, thanks again! And yes, I did get the file name uploading the images from a folder/desktop after using the Guillotine tool. Yeah you can use Imgur or Tinypic, both are good. They have the links listed in the way it was on Photobucket at recording of the video. It looks like Photobucket also changed their layout since then. I'll try to add the updated info in annotations later after things cool down on MAL and the info is more solid. Its unfortunate this happens with the Guillotine/Slice tool, since alot of ppl use those tools for big profile graphics on About Me.. Okay, thanks for the info, it really helped a lot! |
"Later on, you will become a lively person causing headaches as the shrine-god." |
May 4, 2014 11:58 AM
#49

| Thank you very much for this video, Shishio-kun |

More topics from this board
» [CSS - MODERN] ⚡️ Fully-Customizable Layouts (2024 updates!) ( 1 2 3 4 5 ... Last Page )Shishio-kun - Jul 21, 2017 |
381 |
by KabukiChouNights
»»
Sep 13, 10:56 AM |
|
» theme helpthreat - Jul 5 |
5 |
by Zaryf
»»
Aug 21, 5:46 AM |
|
» [CSS - Modern] 🍰 Clarity by V.L ( 1 2 3 4 5 ... Last Page )Valerio_Lyndon - Apr 19, 2018 |
1261 |
by KiranaStarr
»»
Aug 16, 5:48 PM |
|
» [CSS] ⭐️ Customize your List Cursor + Cursor FixesShishio-kun - Mar 8, 2021 |
30 |
by Shishio-kun
»»
Jul 28, 3:17 AM |
|
» How To Have Different Banner/Cover image & Background Image For Manga & Anime ListsYasminaRegina - Jul 25 |
2 |
by YasminaRegina
»»
Jul 26, 1:02 AM |