What you will need:
Fabric:
- Sky Blue - Poly-Cotton - 60" Wide by 2 Meters long
- White - Polly-cotton - 1 meter square
- Sky Blue (matching) Polly-cotton Thread (as your fabric store when you buy the fabric for the matching thread)
- White- Poly-cotton Thread
- 2 x 2 Meters - cotton cord for the Haouris Himo (the cord that ties over the chest)
- Hemming Webtape
- Pole (to hang your haouri on)
- Scissors
- Sewing Machine (you can do this project by hand, but it'll take you longer)
- Tape Meassure
- Pins
- Talor chalk - in White & Blue
- Iron
- Referance image
(if you want to talor your haouri to your fave shinsengumi member)
~#~
"Getting Started"
If you have acsess to a big-table to work on, it'll help a lot, becuase you'll be able to see all of your fabric, but if you dont, dont worry, just remember to take longer to re-check everything before you start cutting and you'll be ok.
First
Lay out your blue fabric - It should be 60" wide and 2M long
2m, is how long the entire garment will be (inc hems)
(this is the standard size for a shinsengumi haori, give or take a few inches depending on your fave shinsengumi-guys height is, however just under 2m is the adverage)
once you've laid it out.
you want to start making your patturn

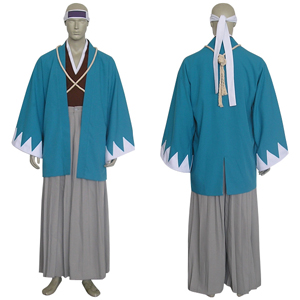
Use your white-chalk to mark, 2-equal - 14" wide lengths
(that run from top to bottom of the fabric, as shown in the image above)
these will be your right and left "body" parts
Iron the lines and then cut the strips out.
however, make sure your strips are stirght and equal before cutting!
Once you've cut them out, mark them Left and right and put them aside for now.
next
Cut out a 4" wide strip
this will be your Collar (put this aside, as you wont need this untill the very end)
with the fabric that is left.
fold in half/Iron as shown and cut.
you'll end up with 2-equal rectangles in size.
(depending on your arm length and how long a drop you wish to have on your sleeve, you may choose-which way the rectangles hang,
but i shall make this clearer later)
But these rectangles will be your sleeves.
mark them left and right and there, your pattern is now complete becuase you have all the parts to make your haouri.
~Part Two~
Now you have you sections.
You have to Iron your "body" strips in half to make a shoulder "seam"
this is just a visual guide and its important that its kept ironed at all times, as it'll help you a lot later on to get everything level.
With them ironed in half, you should be able to hang them on your pole (or wire, if you don’t have a pole at hand)
Drape the fabric over your pole (or wire)
to have them in position for later.
"Next"
Its time for your sleeves.
Before you iron the shoulder seams into them (to match the one you ironed into your body-parts; drape one of the rectangles over your arm.
Your haori should reach "just over" your wrist (in length)
and the "drop" should be a few inches below the "underarm" seam, but its down to personal preference
When yove've chosen which way to have your rectangles to drape; iron them in half like so:

Then hang them on your pole- just like your Body-parts (the shoulder seam should match the one on your body parts, they should all hang level at the bottoms)
thus, you should end up with the image below, which is the first part complete of forming your haori.

~Part Three~
its time to sew your Shoulder-sections to your body parts :3
for now, treat "left" and "right" seperatly,
so as they hang on your pole, make sure you write "left" "right" on each side (if you havent already)
Start with your "Left" side.
you want to "fold back" your body-part over the shoulder part, so that the "body-part" hangs over the top of the shoulder as so: (the sleeve will be very long and is the dark blue area, this will be cut to length later)

Now they should be hanging on your pole as shown.
you need to now measure (from the top) "25 centemters" down and mark with a pin.
this will be the seam that will Join the two-parts and also show you your "drop" that you'll have (as shown)

(Do not cut any fabric, even if you've ended up with a huge drop!)
With "scrap" cotton (cotton that you dont mind wasting)
Tack-stich (without any knots) all the way around to keep your parts together when sewing. (this thread will be pulled out later, so dont worry about neatness)
remember"
when tacking,
only take the garment off the pole when you've tacked one-side, otherwise you'll lose your level.
once you've tacked one side, "then" take it off the poll and tack the other side.
when your done, (with the farbc spread out and the correct way showing) you should get the following image

Now you've tacked one side.
its time to sew it for real (either by hand or) by Machine (as its so much quicker)
sew only where you have "tacked" 25cms.
then drape the garment back on the pole (once sew together)
and remove the tacking-thread
you should get the following image now
(when the farbic is the right way around (not inside out)
there, you have one arm done
do all the same steps (that you did with your left side)
again with your "right side"
and hang them both back on the pole when finished
You now have "Part 3" done
~#~
~PART FOURr~
Now you have both of your "arm seams" sewed,
its time to sew up the rest of the side-parts inorder to close the fabric completely
(Even now, treat both "left & right" parts seperate)
When "tack" stiching & Sewing for real, always turn your fabric inside-out. so your working on the inside of the garment.
The image above is "inside-out view of your left half"
repeat the step above on your "right" side and re-hang (Iron if you need to "re-instate the shoulder-crease and to iron out your seams if they look puffy)
~#~
~PART FIVE~
its time to hem your sleeve (drop and underarm-hem where it will connect to the "body" seam)
|