Good Afternoon!
I am making my *specialty* cake this morning, and I thought i would share. I listed this under expert, because it requires interpretation. No two cakes are the same, so you need prior experience.
Ingredients:
-Bake a brownie. Seriously, just follow the box
-Make some pudding. Instant, ready made. Whatever.
-Fudge container. Just one is fine. Two if you have extra cake decorator skillz.
-2 Chocolate frosting. Try to avoid the whipped at all possible.
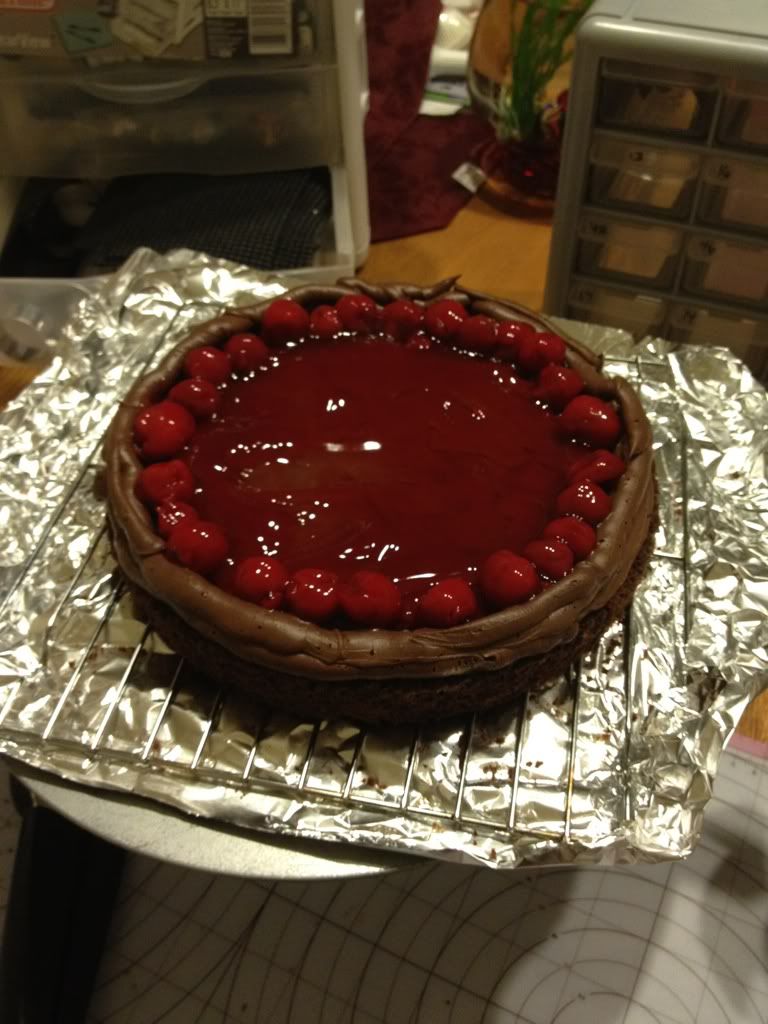
-Fruit filling. Totally optional. Sometimes I find that when you are putting THIS much chocolate in the cake, you need "something" to off set it.
-Chocolate bar / chips. I suggest a variety. I usually use a mixture of German Chocolate and Bitter Sweet Chocolate. Also throw in some Semi Sweet if you want just that extra chocolate type to brag about.
Noteables :
2x 8inch Round Cake containers
Wax Paper
Step 1:
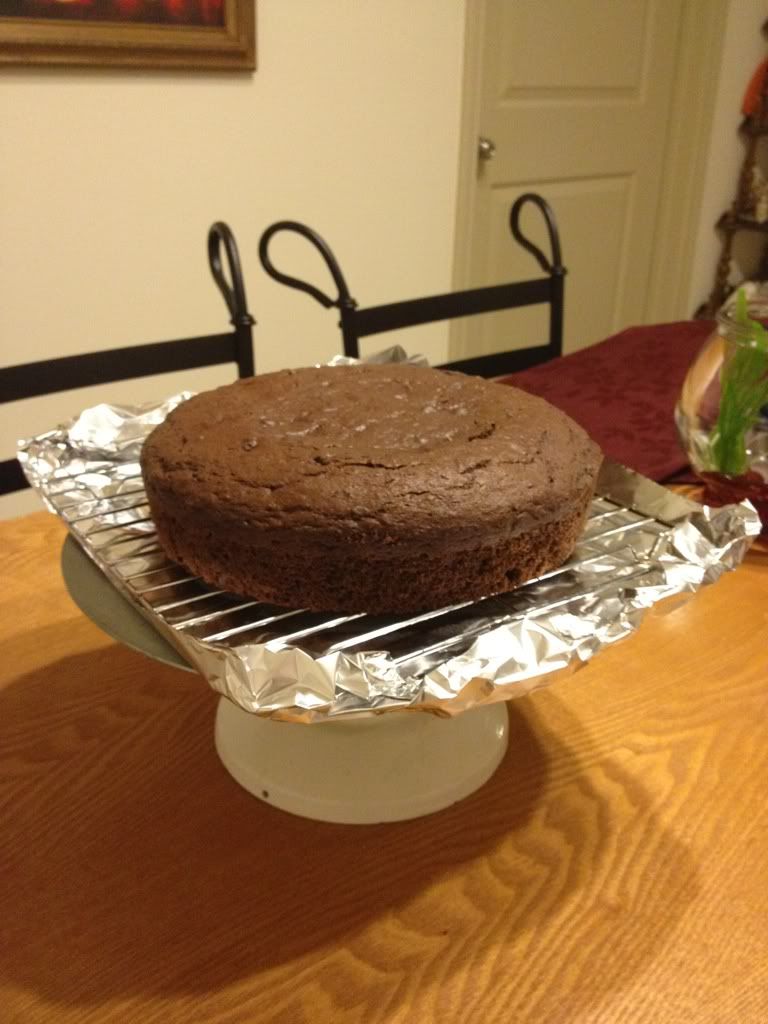
Make Brownies and Cool. I suggest making them in one of the 8 inch round, if you want a literal brownie layer in your cake. Or if you make in a normal pan, then you can just place pieces in the middle.
Step 2: Make Pudding and Cool. Make sure it sets. I also suggest adding a smidge less milk to it as well, because you do want a thicker pudding. Also, use whole milk for that. Really, you aren't getting anything healthy out of this cake.
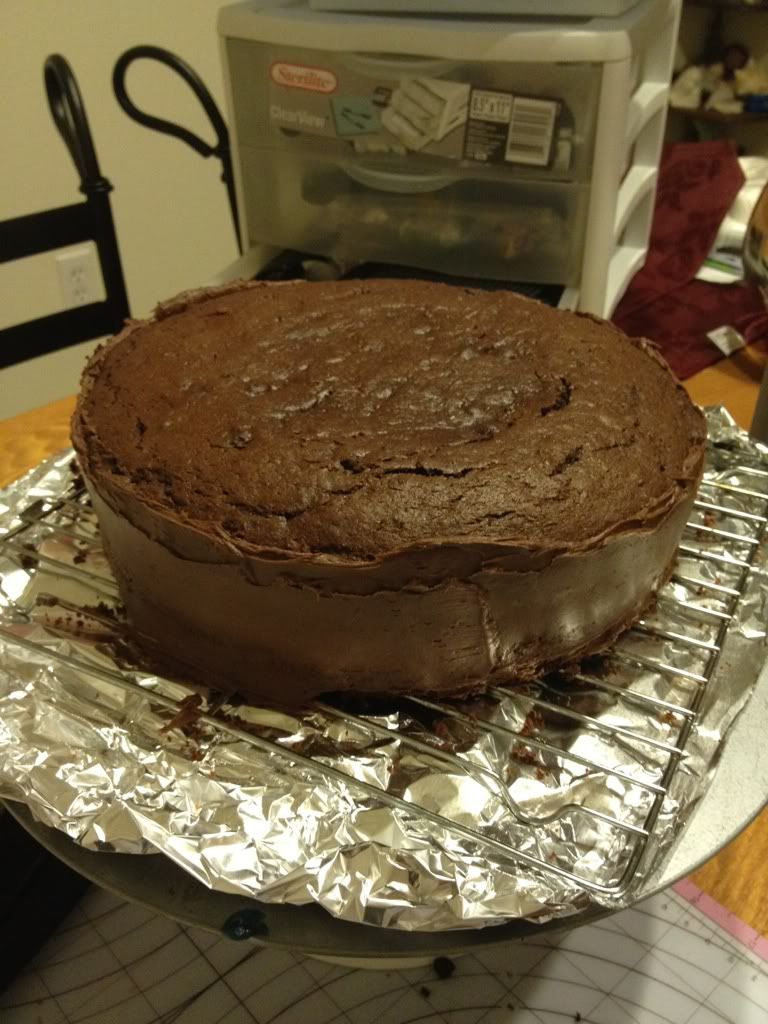
Step 3: Make Cake. Let cool, then place in freezer. Don't worry, cake doesn't freeze. It makes it much easier to decorate without falling apart (though you are covering this all anyway) I find a round cake is much easier to work with in the end stages. Definitely make two layers. Working with cut cake is much more difficult IMHO, especially when dealing with melting chocolate.
Step 4: Put it all together.
-Take two round cakes and make sure the tops are level. My suggestion is to cut the top off both, and flip so their cut edges are in the middle. Makes the top a nice smooth edge.
*Note, when you are placing the cake on the board, place strips of wax paper underneath the edge. Make sure it covers up your board completely. If you are able to, and have the ability to decorate this cake on a cookie rack, even better. (that's how I used to do it!)
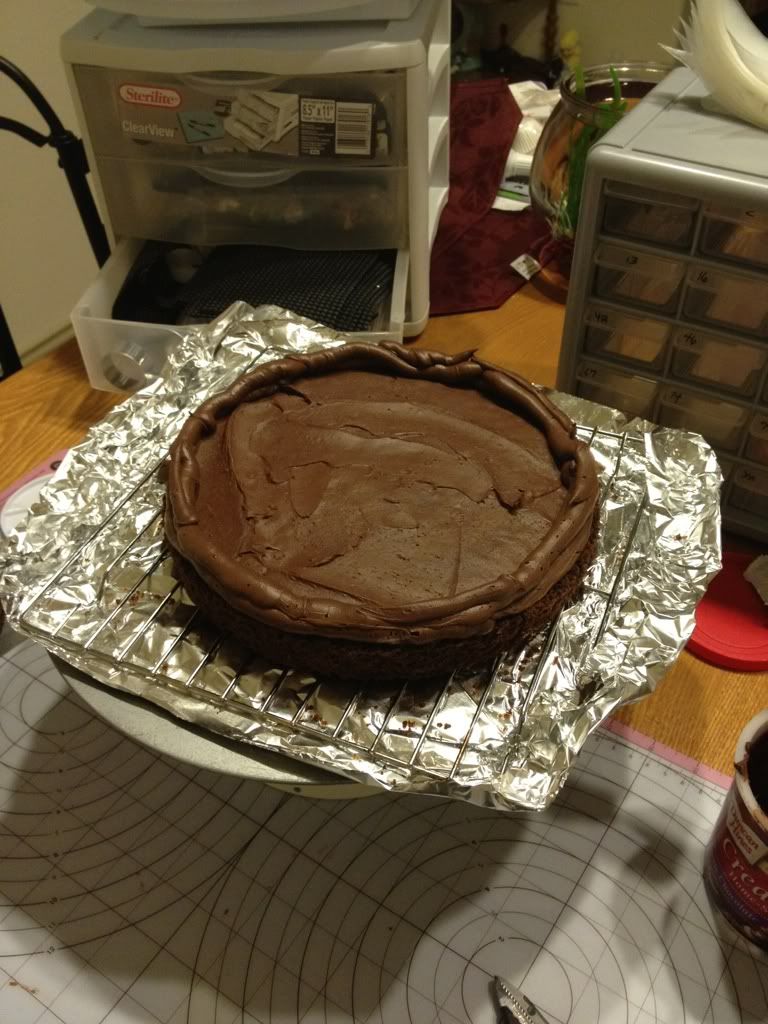
-In the center, this is where you get creative. You need a solid edge or the cake WILL fall apart, especially after what I do with it.
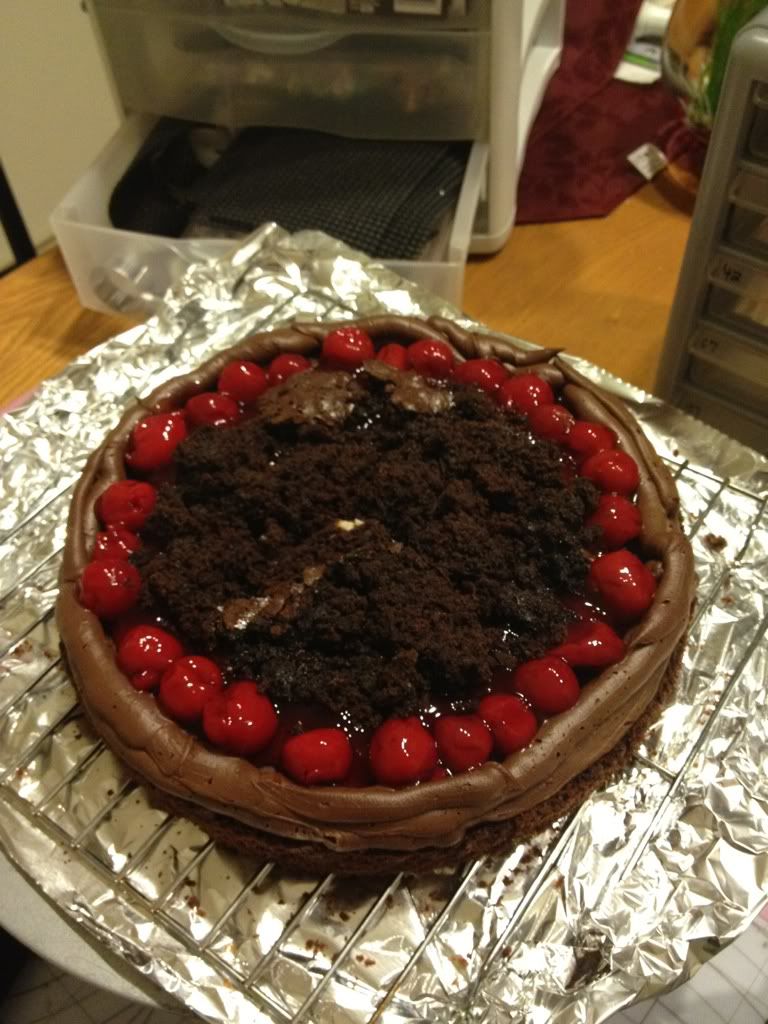
* Cut brownie in half, so you have two circles. place one on top of the other cake with a thin layer of frosting in the middle. This will keep it together (Making the edge slightly thicker. Use a piping bag for this). On top of that, take the other half of the brownie layer, and cut out most of the middle. Place on cake on top of another layer of frosting (Making the edge slightly thicker. Use a piping bag for this). This gives your room to store stuff. Place in pudding / fruit in the center till it fills in the top of the brownie. Pipe more frosting onto the brownie top, and put on remaining cake.
Keep in mind, this is a really really tall cake. when its done ^^;
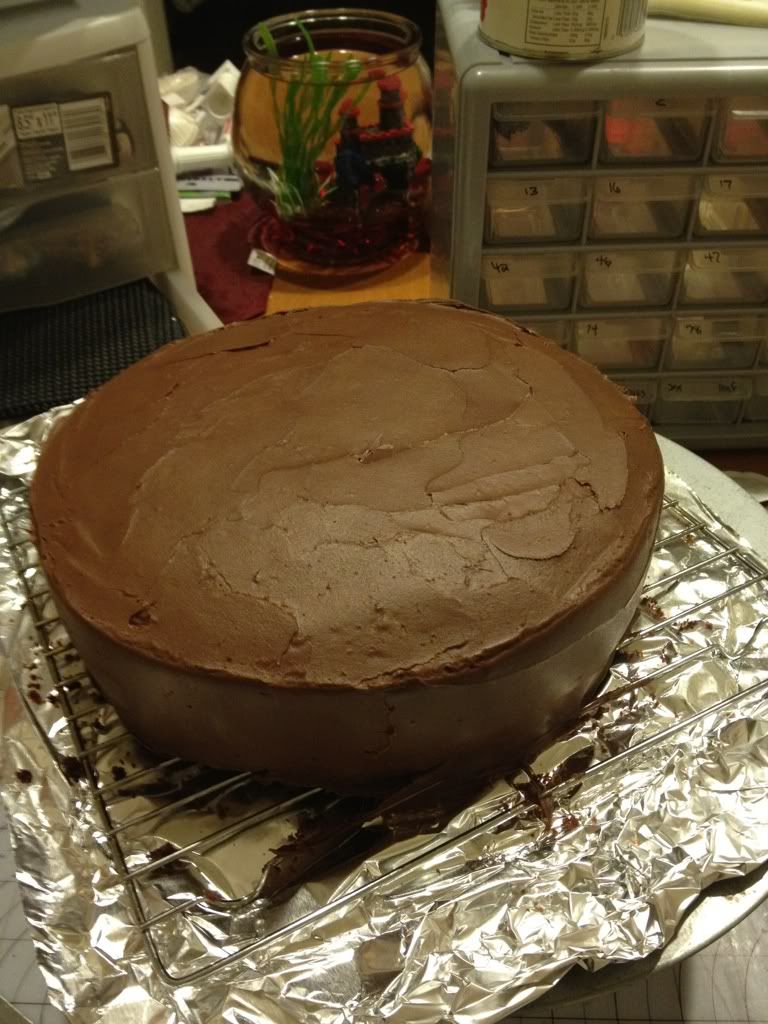
Next, spread out all the frosting that has 'leaked' out with a cake spatula. make sure you fill in any holes with excess frosting. This is basic dirty icing. When you are finished and the outside looks smooth, then frost it as you normally would. And it really doesn't matter if you get crumbs everywhere. However, keep it as smooth as possible, and keep the edges crisp.
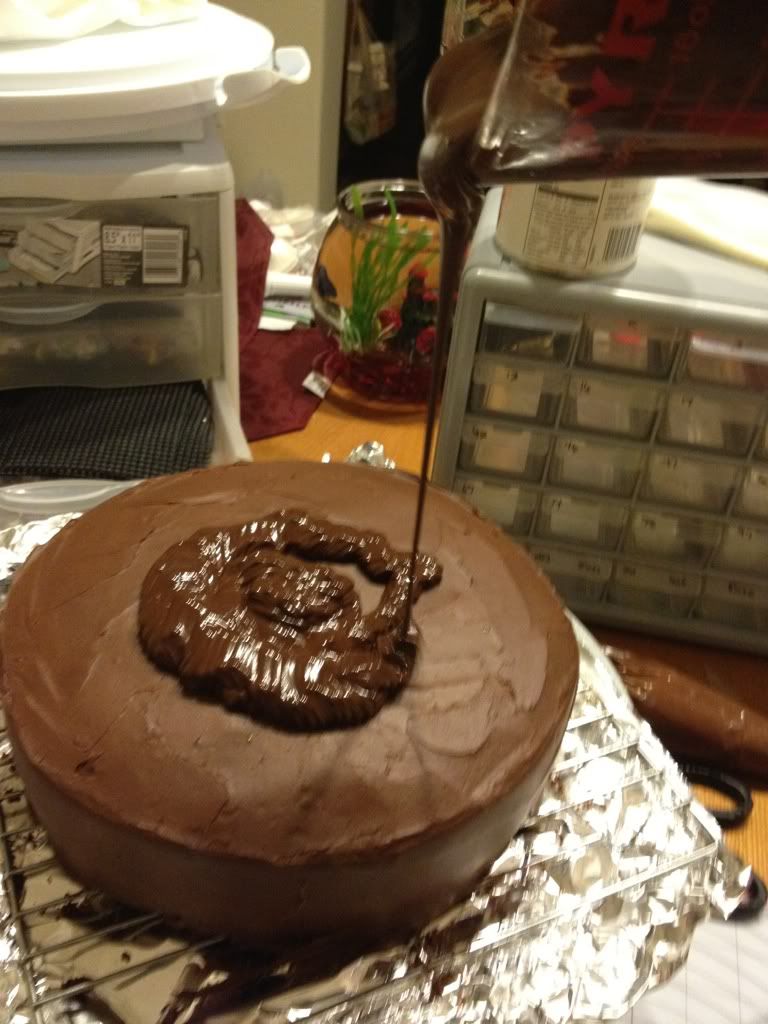
Once that is done, place it in the freezer for the frosting to set. While that is in there, over a double boiler, melt the chocolate pieces. For a thicker coating, heat as is. for something a little thinner, use a smidge of oil. Melt to taste. I suggest something that is a little more on the bitter side. Its better to off set everything that's inside.
By this time your cake will be slightly cool and set. Slowly pour chocolate over cake, making sure that it covers the entire top and down the sides. It will naturally fall to a smooth edge, but keep in mind that you may need to use a small tool to fill in all the holes.
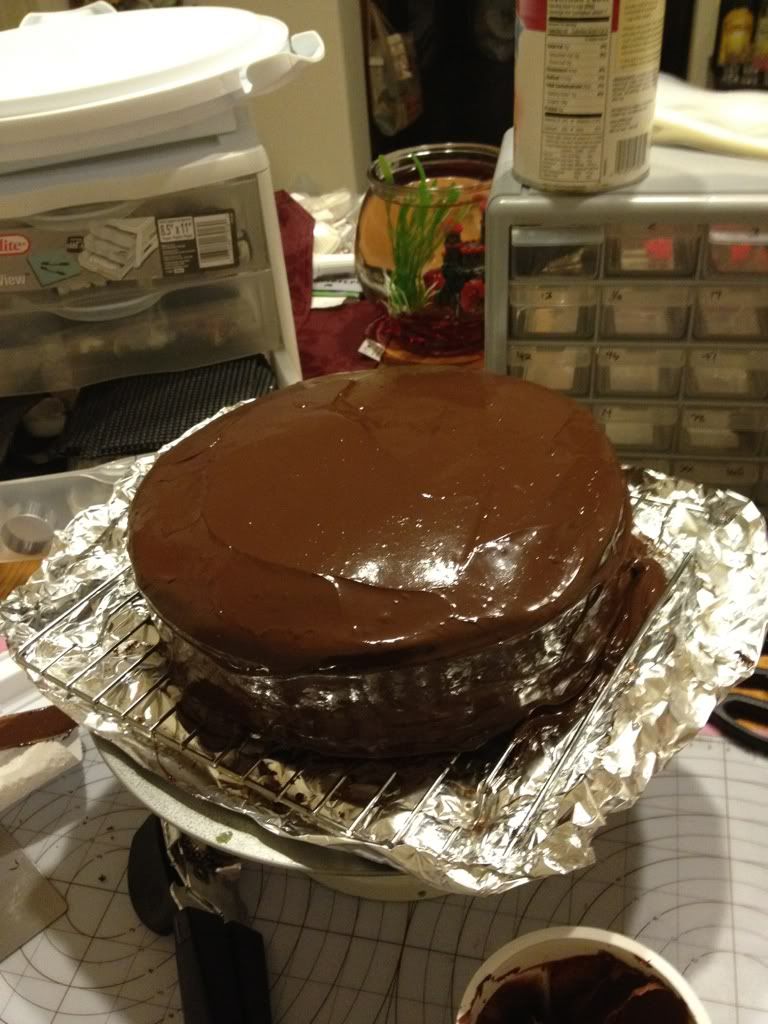
Once completed, place cake in fridge to harden the outside. (It will look like a big ring ding) Once that is complete, gently cut away any chocolate that is on the wax paper. Pull it away gently only after you have cut it all around the cake.
Decorate as desired. This is usually where I use Ganash, but fudge is a nice substitute. I just put a simple border and some flowers. If you decide flowers, alternate between fudge and frosting for the flowers and petals, so it creates a slight color change.
And there you are! I know it isn't super detailed, but hopefully enough of a description that I get my point across. I am making one this morning, so I will post pictures :)
Complete!!
|